Hyundai Kona: Front Seat / Front Seat Frame Assembly Repair procedures
Hyundai Kona (OS) 2018-2024 Service Manual / Body (Interior and Exterior) / Front Seat / Front Seat Frame Assembly Repair procedures
| Replacement |
|
|
| 1. |
Remove the front seat back cover.
(Refer to Front Seat - "Front Seat Back Cover")
|
| 2. |
Remove the front seat cushion cover.
(Refer to Front Seat - "Front Seat Cushion Cover")
|
| 3. |
Remove the SAB module.
(Refer to Restraint - "Side Airbag (SAB) Module")
|
| 4. |
Remove the lumber support assembly.
(Refer to Body Electrical System - "Lumber Support Unit")
|
| 5. |
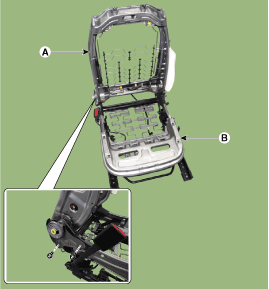
After loosening the mounting bolts, detach the front seat back frame
assembly (A) from the front seat cushion frame assembly (B).
|
| 6. |
To install, reverse removal procedure.
|
 Front Seat Frame Assembly Components and components location
Component Location
1. Front seat back frame assembly
2. Front seat cushion frame assembly
...
 Rear Seat
...
Other information:
Hyundai Kona (OS) 2018-2024 Owners Manual: Check tire inflation pressure
Check your tires, including the spare tire, once a month or more.
How to check
Use a good quality tire pressure gauge to check tire pressure. You can not tell
if your tires are properly inflated simply by looking at them. Radial tires may
look properly inflated when they are under-inflated.
Remove ...
Hyundai Kona (OS) 2018-2024 Service Manual: Shift Lever Repair procedures
Removal
1.
Remove the shift lever knob & boots (A) pull both of it up.
2.
Remove the floor console assembly.
(Refer to Body - "Floor Console")
3.
Remove the fixing clip of wiring ( ...
© 2018-2024 www.hkona.com


