Hyundai Kona: Hood / Hood Latch Repair procedures
| Replacement |
| 1. |
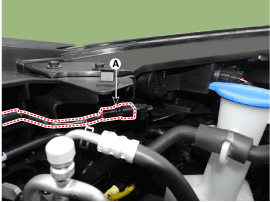
Disconnect the hood lower latch connector (A).
|
| 2. |
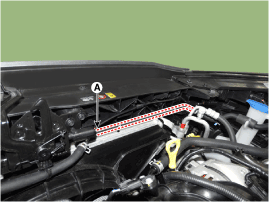
Disconnect the hood latch wiring (A).
|
| 3. |
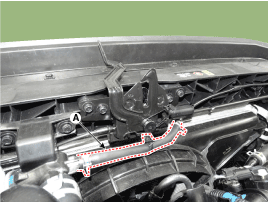
Disconnect the coolant hose clip (A).
|
| 4. |
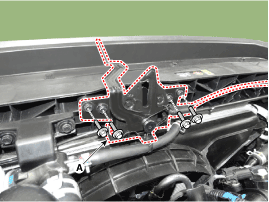
Loosen the mounting bolts and remove the hood lower latch assembly (A).
|
| 5. |
Disconnect the hood latch cable (A) and remove the hood latch (B).
|

| 6. |
To install, reverse removal procedure.
|

 Hood Latch Components and components location
Component Location
1. Hood latch assembly
...
 Liftgate
...
Other information:
Hyundai Kona (OS) 2018-2024 Owners Manual: Distributing the sealant
9. Immediately drive approximately 7~10 km (4~6 miles or, about 10min) to evenly
distribute the sealant in the tire.
Do not exceed a speed of 80 km/h (50 mph). If possible, do not fall below a speed
of 20 km/h (12 mph). While driving, if you experience any unusual vibration, ride
disturbance or ...
Hyundai Kona (OS) 2018-2024 Owners Manual: Components of the Tire Mobility Kit
0. Speed- restriction label 1. Sealant bottle and label with speed restriction
2. Filling hose from sealant bottle to wheel 3. Connectors and cable for the power
outlet direct connection 4. Holder for the sealant bottle 5. Compressor 6.
ON/OFF switch 7. Pressure gauge for displaying the tire inf ...
