Hyundai Kona: Wireless Power Charger System / Wireless Power Charging Unit Repair procedures
| Removal |
Handling wireless charging system parts by wet hands may cause electric
shock.
|

| 1. |
Disconnect the negative (-) battery terminal.
|
| 2. |
Remove the floor console cover assembly.
(Refer to Body - "Floor Console Assembly")
|
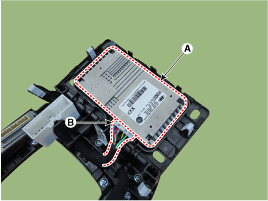
| 3. |
Remove the wireless power charger unit (A) after mounting screws
and disconnecting the connector (B).
|
| Installation |
| 1. |
Install the wireless power charging unit.
|
| 2. |
Connect the wireless power charging unit connectors.
|
| 3. |
Install the floor console assembly.
|
| 4. |
Connect the negative (-) battery terminal.
|
| [Diagnosis With KDS/GDS] |
| 1. |
The body electrical system can be more quickly diagnosed for troubles
by using the vehicle diagnostic system (KDS/GDS).
KDS/GDS provides the following information.
|
| 2. |
To diagnose the vehicle by using the diagnostic equipment, select
"vehicle model" and "wireless power charger system" to be inspected.
|
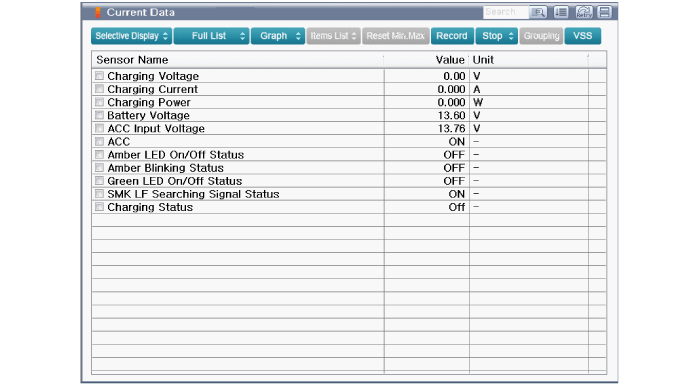
| 3. |
To inquire the current status of input/output values, select the
"Sensor Data" menu
The input/output values of the sensors corresponding to the selected
module can be checked.
|
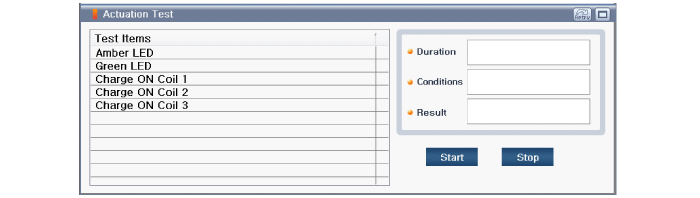
| 4. |
To perform forced operation of the selected module input, select
"Actuation Test".
|
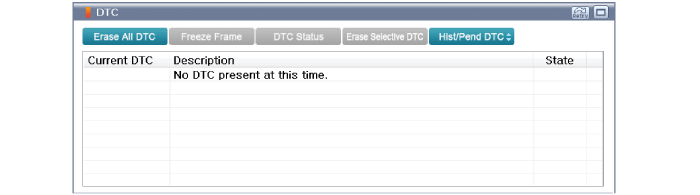
| 5. |
To inquire the cause of trouble for each module by self diagnosis,
select 'Diagnostic Trouble Code'.
|
 Wireless Power Charging Unit Circuit diagram
Circuit Diagram
...
 Wireless Charging Lamp Components and positions
Components
...
Other information:
Hyundai Kona (OS) 2018-2024 Owners Manual: Headlamp leveling device
Manual type
To adjust the headlamp beam level according to the number of the passengers and
loading weight in the luggage area, turn the beam leveling switch.
The higher the number on the switch position, the lower the headlamp beam level.
Always keep the headlight beam at the proper leveling pos ...
Hyundai Kona (OS) 2018-2024 Owners Manual: Fuses
A vehicle’s electrical system is protected from electrical overload damage by
fuses.
This vehicle has 2 (or 3) fuse panels, one located in the driver’s side panel
bolster, the other in the engine compartment.
If any of your vehicle’s lights, accessories, or controls do not work, check
the ...
