Hyundai Kona: Front Door / Front Door Latch Repair procedures
| Replacement |
| 1. |
Remove the front door outside handle.
(Refer to Front Door - "Front Door Outside Handle")
|
| 2. |
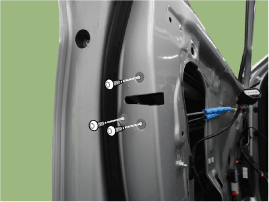
Loosen the front door latch mounting screws.
|
| 3. |
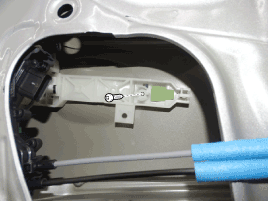
Loosen the front outside handel base mounting screw.
|
| 4. |
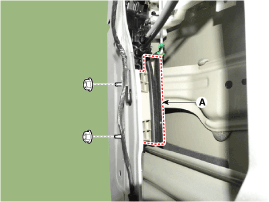
After loosening the mounting nuts, remove the front door channel (A).
|
| 5. |
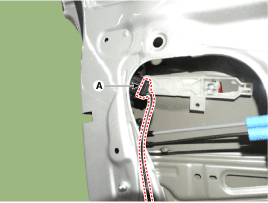
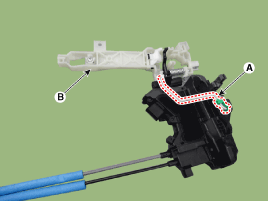
Disconnect the front door latch connector (A).
|
| 6. |
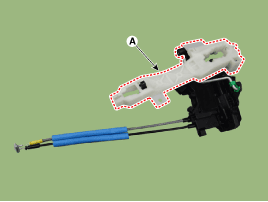
Remove the front door outside handle base bracket (A).
|
| 7. |
After loosening the front door outside handle rod (A), remove the front
door outside handle base (B).
|
| 8. |
To install, reverse removal procedure.
|
 Front Door Latch Components and components location
Component Location
1. Front door latch
...
 Front Door Belt Outside Weatherstrip Repair procedures
Replacement
1.
Pull down the front door window glass to the lowest level by pressing
the power window glass switch.
2.
Using a screwdr ...
Other information:
Hyundai Kona (OS) 2018-2026 Service Manual: Driver Airbag (DAB) Module and Clock Spring Repair procedures
Removal
1.
Disconnect the battery negative cable and wait for at least three minutes
before beginning work.
2.
Putting in a flat tool (Ă˜5mm) into the guide hole (A) and then release
the DAB fixed pin.
...
Hyundai Kona (OS) 2018-2026 Owners Manual: Start-up
You can start the engine without inserting the key. For detailed information
refer to the Engine Start/Stop button in chapter 5.
NOTICE
To prevent damaging the smart key:
Keep the smart key away from water or any liquid and fire. If the inside
of the smart key gets damp (due to drinks or moistu ...

