Hyundai Kona: Interior Trim / Front Pillar Trim Repair procedures
| • |
Put on gloves to prevent hand injuries.
|
|
| • |
When removing with a flat-tip screwdriver or remover, wrap protective
tape around the tools to prevent damage to components.
|
| • |
When removing the interior trim pieces, use a plastic panel
removal tool not to damage the surface.
|
| • |
Take care not to bend or scratch the trim and panels.
|
|
| 1. |
Remove the front pillar trim.
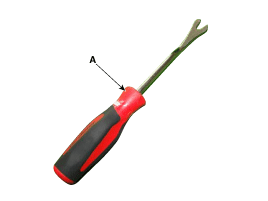
| (1) |
To remove the front pillar trim, the fastener remover (A) below
must be used.
|
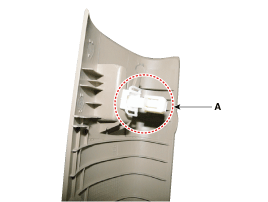
| (2) |
After slightly lifting up the front pillar trim and putting
the tool in, remove the mounting clip (A) by pulling it.
|
• |
Once the front pillar trim is removed, be sure
to replace the clips with new ones.
|
|
|
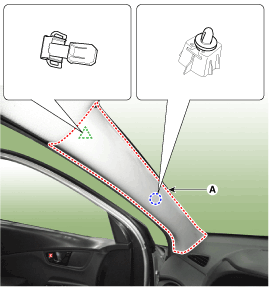
| (3) |
Remove the front pillar trim (A).
|
|
| 2. |
To install, reverse removal procedure.
| •
|
Replace any damaged clips (or pin-type retainers).
|
|
|
Component Location
1. Front pillar trim
...
Component Location
1. Center pillar lower trim
2. Center pillar upper trim
...


 Front Pillar Trim Components and components location
 Center Pillar Trim Components and components location