Hyundai Kona: Front Seat Belt / Front Seat Belt Pretensioner Repair procedures
| Replacement |
|

| 1. |
Remove the center pillar upper trim.
(Refer to Interior Trim - "Center Pillar Trim")
|
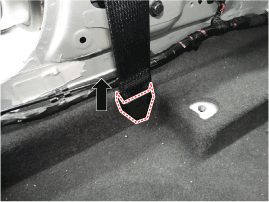
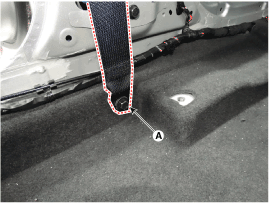
| 2. |
After loosening the mounting bolt, then remove the front seat belt lower
anchor (A).
|
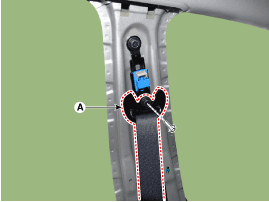
| 3. |
After loosening the front belt upper anchor mounting bolt, remove the
front belt upper anchor (A).
|
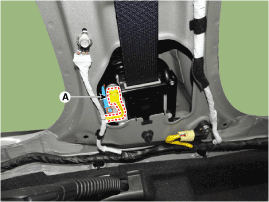
| 4. |
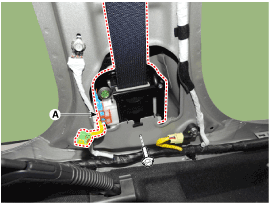
Disconnect the front seat belt pretensioner connector (A).
|
| 5. |
Loosen the mounting bolt and remove the front belt retractor (A).
|
| 6. |
To install, reverse removal procedure.
|

 Front Seat Belt Pretensioner Components and components location
Component Location
1. Front seat belt pretensioner
...
 Height Adjust Components and components location
Component Location
1. Height adjust
...
Other information:
Hyundai Kona (OS) 2018-2026 Service Manual: Components and components location
Components (1)
1. Crash pad assembly
2. Crash pad side cover [LH]
3. Crash pad side cover [RH]
4. Crash pad lower panel
5. Steering column shroud lower panel
Componets (2)
1. Cluster fascia upper panel
2. Side a ...
Hyundai Kona (OS) 2018-2026 Owners Manual: Heated steering wheel
When the ignition switch is in the ON position or when the engine is running,
press the heated steering wheel button to warm the steering wheel.
The indicator on the button will illuminate. To turn the heated steering wheel
off, press the button again. The indicator on the button will turn off.
I ...
