Hyundai Kona: Headrest / Front seat headrests
The driverŌĆÖs and front passengerŌĆÖs seats are equipped with adjustable headrests for the passengers safety and comfort.
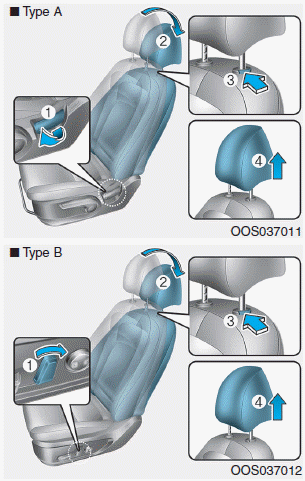
Adjusting the height up and down
To raise the headrest:
1. Pull it up to the desired position (1).
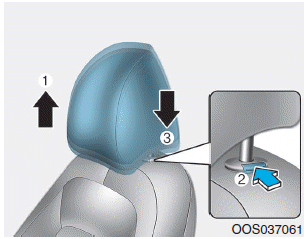
To lower the headrest:
1. Push and hold the release button (2) on the headrest support.
2. Lower the headrest to the desired position (3).
Forward and rearward adjustment
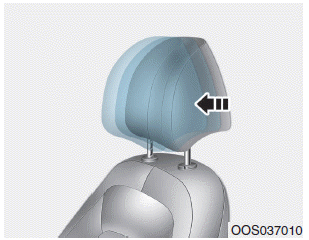
The headrest may be adjusted forward to 3 different positions by pulling the headrest forward to the desired detent. To adjust the headrest to itŌĆÖs furthest rearwards position, pull it fully forward to the farthest position and release it.
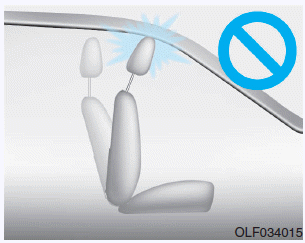
NOTICE
If you recline the seatback towards the front with the headrest and seat cushion raised, the headrest may come in contact with the sunvisor or other parts of the vehicle.
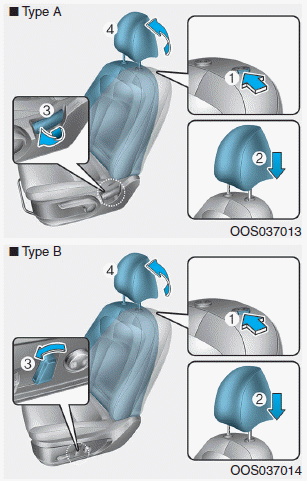
Removal/Reinstall
To remove the headrest:
1. Recline the seatback (2) with using the seatback angle lever or switch (1).
2. Raise the headrest as far as it can go.
3. Press the headrest release button (3) while pulling the headrest up (4).
WARNING
NEVER allow anyone to travel in a seat with the headrest removed.
To reinstall the headrest :
1. Recline the seatback.
2. Put the headrest poles (2) into the holes while pressing the release button (1).
3. Adjust the headrest to the appropriate height.
4. Recline the seatback (4) the seatback angle knob or switch (3).
WARNING
Always make sure the headrest locks into position after reinstalling and adjusting it properly.
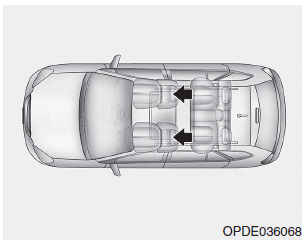
 Headrest
The vehicleŌĆÖs front and rear seats have adjustable headrests. The headrests provide
comfort for passengers, but more importantly they are designed to help protect passengers
from whiplash and othe ...
 Rear seat headrests
The rear seats are equipped with headrests in all the seating positions for the
passengerŌĆÖs safety and comfort.
CAUTION
ŌĆó Adjust the headrests so the middle of the headrests is at the same heigh ...
Other information:
Hyundai Kona (OS) 2018-2026 Owners Manual: Engine Start/Stop button
Whenever the front door is opened, the Engine Start/Stop button will illuminate
and will go off 30 seconds after the door is closed.
WARNING
To turn the engine off in an emergency:
Press and hold the Engine Start/ Stop button for more than two seconds OR
Rapidly press and release the Engine Start ...
Hyundai Kona (OS) 2018-2026 Service Manual: General information
Important Safety Notice
Proper service methods and repair procedures are essential for safe, reliable
operation of all motor vehicles as well as personal safety of the operator.
The service procedures and descriptions in this shop manual provide general
directions for servic ...
