Hyundai Kona: Crash Pad / Crash pad garnish assembly [RH] Repair procedures
| Replacement |
|

|

| 1. |
Remove the cluster fascia panel.
(Refer to Cluster Pad - "Center Fascia Panel")
|
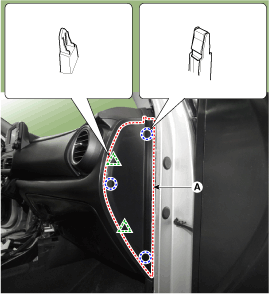
| 2. |
Using a screwdriver or remover, remove the crash pad side cover [RH]
(A).
|
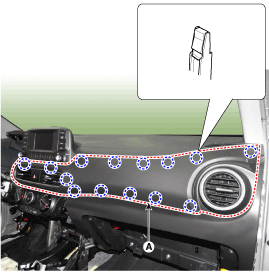
| 3. |
After loosening the mounting screws, remove the crash pad garnish assembly
[RH] (A).
|
| 4. |
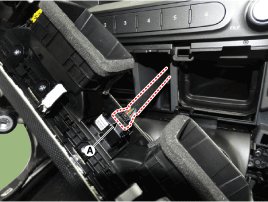
Disconnect the hazard switch connector (A).
|
| 5. |
To install, reverse the removal procedure.
|

 Crash pad garnish assembly [RH] Components and components location
Components Location
1. Crash pad garnish assembly
[RH]
...
 Crash Pad Lower Panel Components and components location
Component Location
1. Crash pad lower panel
...
Other information:
Hyundai Kona (OS) 2018-2026 Service Manual: Speakers Repair procedures
Inspection
1.
Troubleshooting for Speaker
(1)
Basic inspection of speaker
Inspect the sound from speaker after verifying that the speaker
mounting screws is removed and the wiring connector is connected
precise ...
Hyundai Kona (OS) 2018-2026 Service Manual: Electric WGT Control Actuator Description and operation
Desrcription
The Electric WGT Control Actuator is installed on the turbocharger. It operates
the vain in the Waste Gate Turbocharger (WGT) and regulates the compressed air
amount by the ECM's PWM signal. This actuator consists of a DC motor which actuates
the vane, a 2-s ...
