Hyundai Kona: Front Seat / Front Seat Shield Outer Cover Repair procedures
Hyundai Kona (OS) 2018-2026 Service Manual / Body (Interior and Exterior) / Front Seat / Front Seat Shield Outer Cover Repair procedures
| Replacement |
|

|

| 1. |
Remove the front seat assembly.
(Refer to Front Seat - "Front Seat Assembly")
|
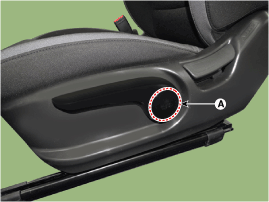
| 2. |
Using a screwdriver or remover, remove the front seat height knob cap
(A).
|
| 3. |
After loosening the mounting screws, remove the front seat height knob
(A).
|
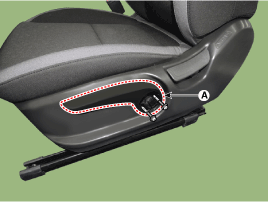
| 4. |
Using a screwdriver or remover, remove the front seat recliner lever
(A).
|
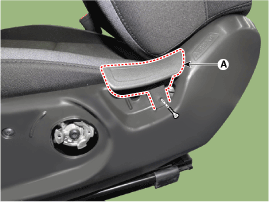
| 5. |
Remove the front seat outer shield cover (A) by pulling forward in the
direction of the arrow using screw driver or remover.
|
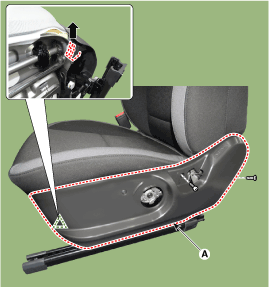
| 6. |
To install, reverse removal procedure.
|
 Front Seat Shield Outer Cover Components and components location
Component Location
1. Front seat shield outer cover
...
 Front Seat Shield Inner Cover Components and components location
Component Location
1. Front seat shield inner cover
...
Other information:
Hyundai Kona (OS) 2018-2026 Service Manual: TPMS Receiver Description and operation
Description
TPMS Receiver : BCM(body control module) integrated management
1.
Mode
(1)
Virgin State
ŌĆó
The receiver as a sole part is shipped in this state.
Replacem ...
Hyundai Kona (OS) 2018-2026 Service Manual: Components and components location
Component Location
1. Auto light sensor
2. Head lamps
3. Lighting switch (Auto)
4. Rear combination lamp
5. BCM (Body Control Module)
...
┬® 2018-2026 www.hkona.com
