Hyundai Kona: Keyless Entry And Burglar Alarm / Repair procedures
| Inspection |
|
| 1. |
Remove the front door trim.
(Refer to Body - "Front Door Trim")
|
| 2. |
Remove the front door module.
(Refer to Body - "Front Door Module")
|
| 3. |
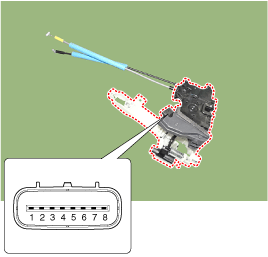
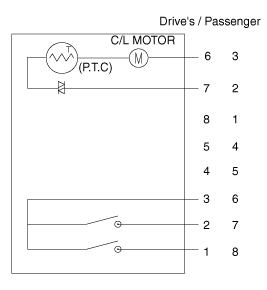
Disconnect the connector from the actuator.
|
|||||||||||||||||||||||||||||
| 4. |
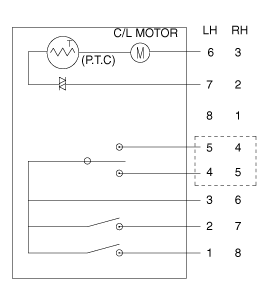
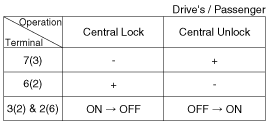
Check actuator operation by connecting power and ground according
to the table. To prevent damage to the actuator, apply battery voltage
only momentarily.
|
| 1. |
Remove the rear door trim.
(Refer to Body - "Rear Door Trim")
|
| 2. |
Remove the rear door module.
(Refer to Body - "Rear Door Module")
|
| 3. |
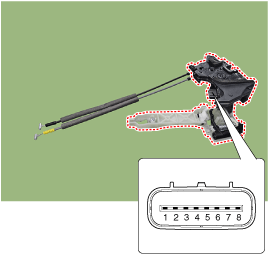
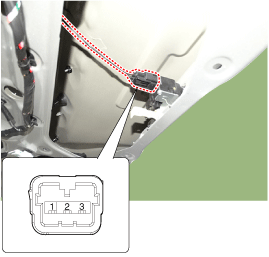
Disconnect the connectors from the actuator.
|
|||||||||||||||||||||||||||||
| 4. |
Check actuator operation by connecting power and ground according
to the table. To prevent damage to the actuator, apply battery voltage
only momentarily.
|
| 1. |
Remove the trunk lid trim.
(Refer to Body - "Trunk Lid Trim")
|
| 2. |
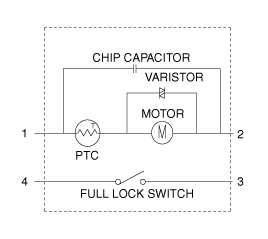
Disconnect the connector from the actuator
|
| 3. |
Check actuator operation by connecting power and ground according
to the table. To prevent damage to the actuator, apply battery voltage
only momentarily.
|
| 4. |
Checking the trunk of the vehicle power option power refers to the
trunk module.
|
| 1. |
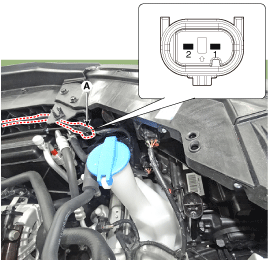
Disconnect the connector (A).
|
| 2. |
Check for continuity between the terminals and ground according
to the table
(Refer to Body - "Hood Latch")
|
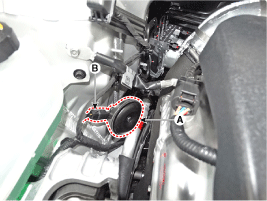
| 1. |
Remove the burglar horn (A) after loosening the mounting bolts and
disconnecting the connector (B).
|
| 2. |
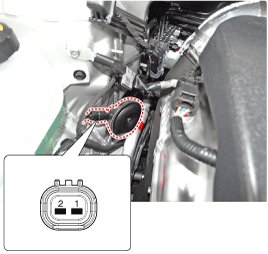
Test the burglar horn by connecting battery power to the terminal
2 and ground the terminal 1.
|
 Description and operation
Description
Burglar Alarm State [B/A State]
B/A State
Description
DISARM
1)
...
Other information:
Hyundai Kona (OS) 2018-2026 Owners Manual: Headlamp aiming
1. Inflate the tires to the specified pressure and remove any loads from the
vehicle except the driver, spare tire, and tools.
2. The vehicle should be placed on a flat floor.
3. Draw vertical lines (Vertical lines passing through respective head lamp centers)
and a horizontal line (Horizontal li ...
Hyundai Kona (OS) 2018-2026 Service Manual: Valve clearance adjustment
Valve Clearance Inspection
and Adjustment
•
Inspect and adjust the valve clearance when the engine is cold
(Engine coolant temperature : 20°C) and cylinder head is installed ...


