Hyundai Kona: AVN System / Speaker Repair procedures
| Inspection |
| 1. |
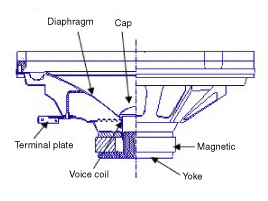
Troubleshooting for Speaker
|


| Removal |
| 1. |
Disconnect the negative (-) battery terminal.
|
| 2. |
Remove the front door trim.
(Refer to Body - "Front Door Trim")
|
| 3. |
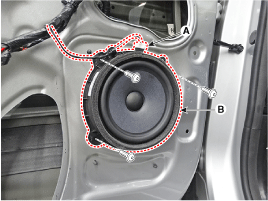
Remove the front door speaker (B) after disconnecting the connector
(A) and loosening the screws.
|
| 1. |
Disconnect the negative (-) battery terminal.
|
| 2. |
Remove the front door trim.
(Refer to Body - "Front Door Trim")
|
| 3. |
Remove the tweeter speaker (A) after loosening the screws.
|
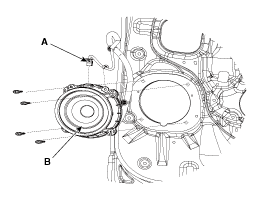
| 1. |
Disconnect the negative (-) battery terminal.
|
| 2. |
Remove the rear door trim.
(Refer to Body - "Rear Door Trim")
|
| 3. |
Remove the rear door speaker (B) after disconnecting the connector (A)
and loosening the screws.
|
|
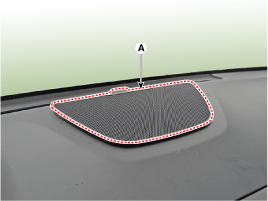
| 1. |
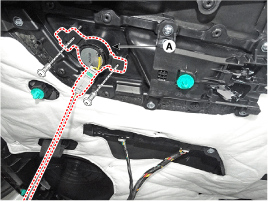
Using a screwdriver or remover, remove the crash pad center speaker
grille (A).
|
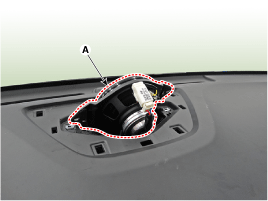
| 2. |
Remove the center speaker (A) after disconnect the connector and loosening
the screws.
|
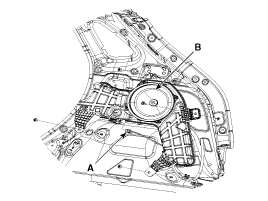
| 1. |
Disconnect the negative (-) battery terminal.
|
| 2. |
Remove the tailgate luggage side trim.
(Refer to Body - " Luggage Side Trim")
|
| 3. |
Remove the sub woofer speaker (A) after disconnect the connector (B)
and loosening the nuts.
|
| Installation |
| 1. |
Install the front door speaker.
|
| 2. |
Install the front door trim.
|
| 3. |
Connect the negative (-) battery terminal.
|
| 1. |
Install the front door tweeter speaker.
|
| 2. |
Install the front door trim.
|
| 3. |
Connect the negative (-) battery terminal.
|
| 1. |
Install the rear door speaker.
|
| 2. |
Install the front door trim.
|
| 3. |
Connect the negative (-) battery terminal.
|
|
| 1. |
Install the center speaker.
|
| 2. |
Install the center speaker grille.
|
| 1. |
Install the subwoofer speaker.
|
| 2. |
Install the liggage side trim.
|
 AVN Antenna Repair procedures
Removal
Roof Antenna
1.
Disconnect the negative (-) battery terminal.
2.
Remove the roof trim assembly.
(Refer to Body - " ...
 AUX jack Schematic diagrams
Circuit Diagram
...
Other information:
Hyundai Kona (OS) 2018-2026 Service Manual: Repair procedures
Inspection
–
The ON/OFF for FCA is included in the USM (User Setting Menu) and the
default is ON.
–
While IGN is On, it stays at ON, however, the driver's settings do not
last next time when IGN is newly On.
...
Hyundai Kona (OS) 2018-2026 Service Manual: DC/DC Converter Description and operation
Description
Due to the considerably more frequent occurrence of starting operations, the
electrical load that occurs often leads to voltage dips in the vehicle network.
In order to stabilize the power supply for certain voltage-sensitive electrical
components, a DC/DC conve ...
