Hyundai Kona: Air Conditioning System / Auto Defogging Sensor Repair procedures
Hyundai Kona (OS) 2018-2026 Service Manual / Heating, Ventilation and Air Conditioning / Air Conditioning System / Auto Defogging Sensor Repair procedures
| Diagnosis With GDS |
| 1. |
The heating, ventilation and air conditioning can be quickly diagnosed
failed parts with vehicle diagnostic system (GDS).
※ The diagnostic system (GDS) provides the following information.
(1) Self diagnosis : Checking the failure code (DTC) and display.
(2) Current data : Checking the system input/output data state.
(3) Actuation test : Checking the system operation condition.
(4) Additional function : Other controlling such as he system option
and zero point adjustment.
|
| 2. |
Select the 'Car model' and the system to be checked in order to
check the vehicle with the tester.
|
| 3. |
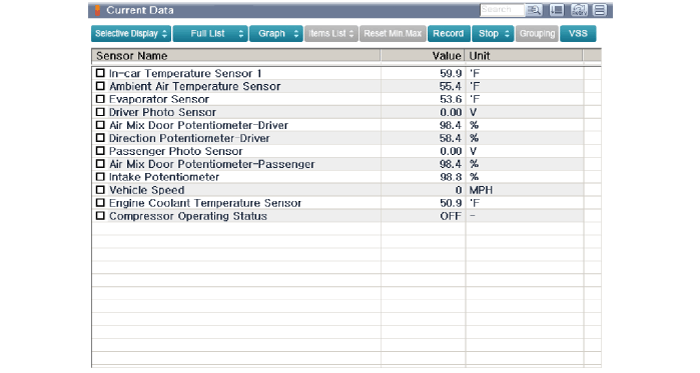
Select the 'Current data' menu to search the current state of the
input / output data.
The input / output data for the sensors corresponding to the Auto
Defogging Sensor can be checked.
|
| Replacement |
| 1. |
Disconnect the negative (-) battery terminal.
|
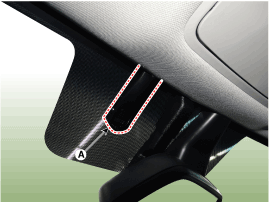
| 2. |
Remove the auto defogging cover (A).
|
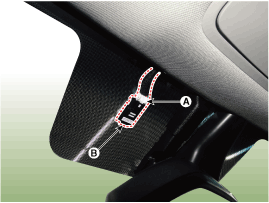
| 3. |
Disconnect the connector (A) and then remove the auto defogging
sensor (B).
|
| 4. |
To install, reverse the removal procedure.
|
 Auto Defogging Sensor Description and operation
Description
The auto defogging sensor is installed on the front window glass. The sensor
judges and sends signal if moisture occurs to blow out wind for defogging.
The ai ...
 Cluster Ionizer Components and components location
Components Location
1. Cluster lonizer
...
Other information:
Hyundai Kona (OS) 2018-2026 Service Manual: Photo Sensor Description and operation
Description
The photo sensor is located at the center of the defrost nozzles.
The photo sensor contains a photovoltaic (sensitive to sunlight) diode.
The solar radiation received by its light receiving portion, generates an
electromotive force in proportion to th ...
Hyundai Kona (OS) 2018-2026 Service Manual: Front Hub / Knuckle / Tone Wheel Components and components location
Components
1. Disc brake
2. Hub bearing
3. Dust cover
4. Front knuckle
...
© 2018-2026 www.hkona.com


