Hyundai Kona: Lighting System / Head Lamps Repair procedures
Hyundai Kona (OS) 2018-2026 Service Manual / Body Electrical System / Lighting System / Head Lamps Repair procedures
| Head Lamp Aiming Instructions |
[Mechanical Aiming]
The head lamps should be aimed with the proper beam-setting equipment, and
in accordance with the equipment manufacturer's instructions.
|
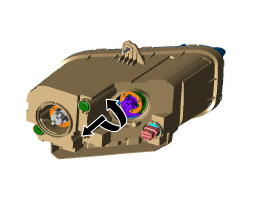
Alternately turn the adjusting gear to adjust the head lamp aiming. If beam-setting
equipment is not available, proceed as follows :
| 1. |
Inflate the tires to the specified pressure and remove any loads
from the vehicle except the driver, spare tire, and tools.
|
| 2. |
The vehicle should be placed on a flat floor.
|
| 3. |
. Draw vertical lines (Vertical lines passing through respective
head lamp centers) and a horizontal line (Horizontal line passing
through center of head lamps) on the screen.
|
| 4. |
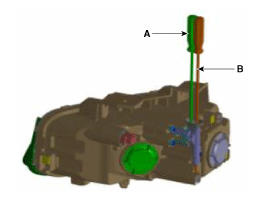
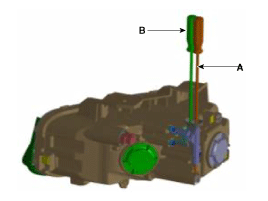
With the head lamp and battery in normal condition, aim the head
lamps so the brightest portion falls on the horizontal and vertical
lines.
A : Vertical (High beam / Low beam)
B : Horizontal (High beam / Low beam)
[Front Fog Lamp Aiming]
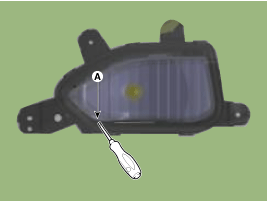
The front fog lamps should be aimed as the same manner of the head
lamps aiming.
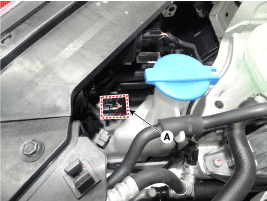
With the front fog lamps and battery normal condition, aim the front
fog lamps by turning the adjusting screw (A) with a driver.
|
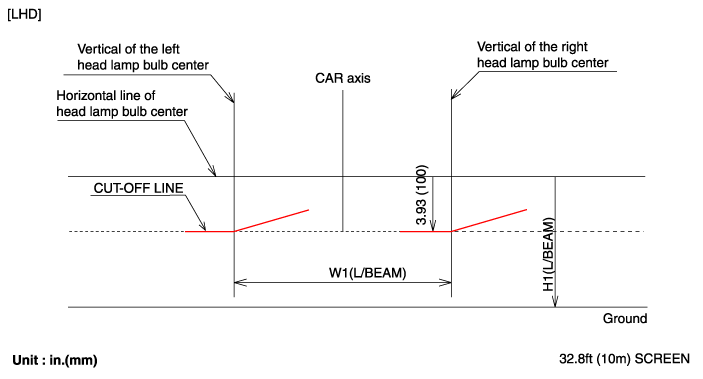
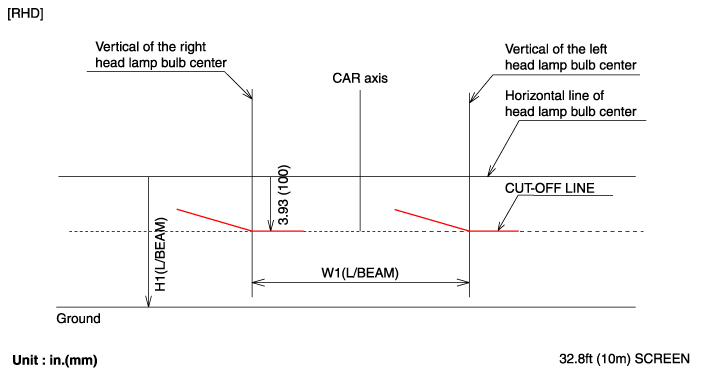
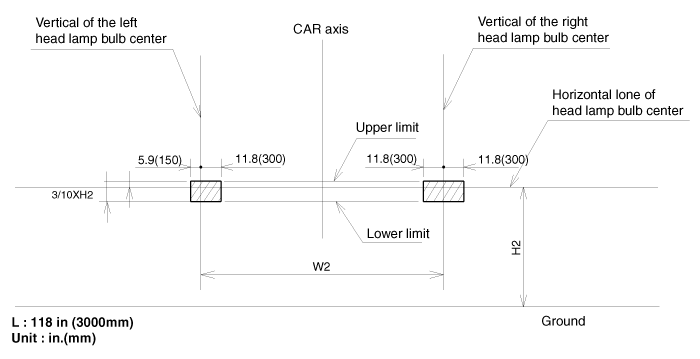
Head Lamp and Fog Lamp Aiming Point
[Halogen]
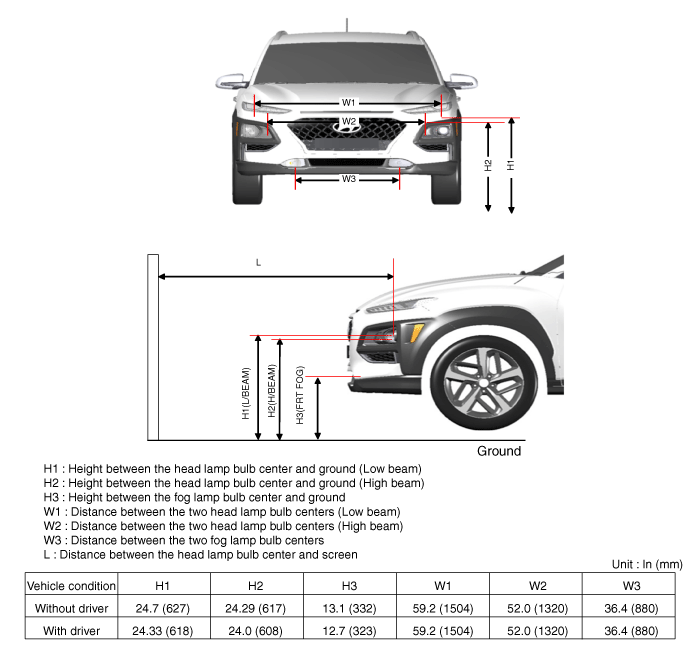
Bi-Function
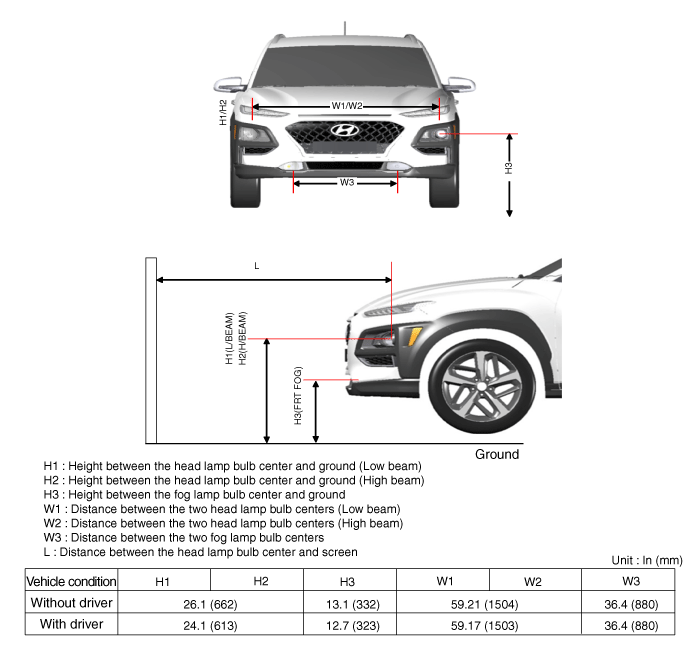
| 1. |
Head Lamp (Low beam)
|
| 2. |
Head Lamp (High beam)
|
| 3. |
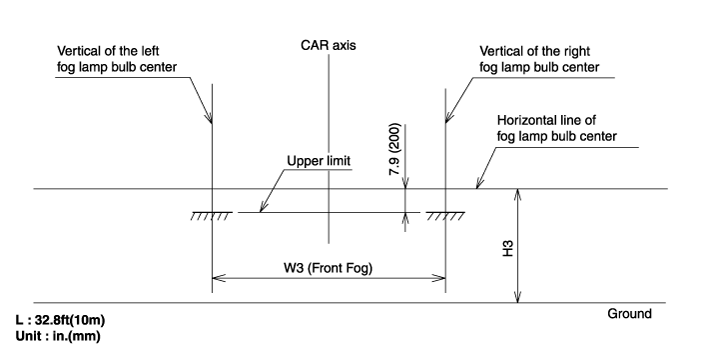
Turn the front fog lamp on without the driver aboard.
The cut-off line should be projected in the allowable range (shaded
region)
|
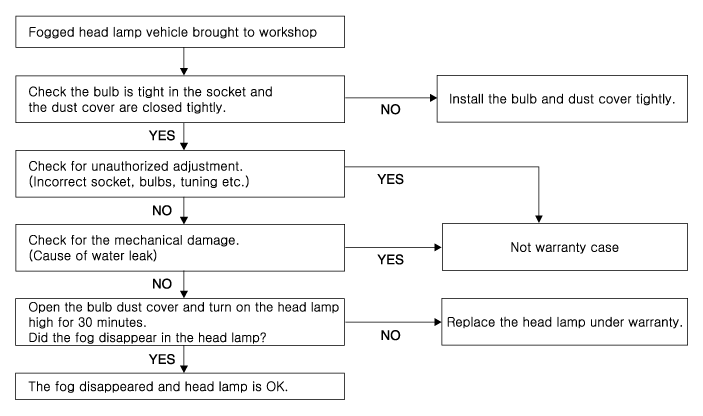
Head Lamp Fogging
Check the below instruction procedure when the head lamp is fogged.
| Removal |
| 1. |
Disconnect the negative (-) battery terminal.
|
| 2. |
Remove the front bumper cover.
(Refer to Body - "Front Bumper Cover")
|
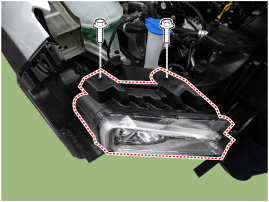
| 3. |
Disconnect the head lamp connector (A).
|
| 4. |
Remove the head lamp after loosening mounting bolts.
|
| Installation |
| 1. |
Install the head lamp assembly after connecting the connector.
|
| 2. |
Install the front bumper corver.
|
| 3. |
Connect the negative (-) battery terminal.
|
| Replacement |
[Turn Signal Lamp]
| 1. |
Turn the head lamp power off.
|
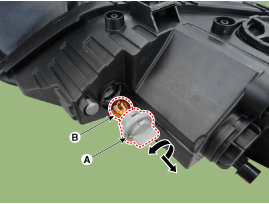
| 2. |
Remove the bulb socket (B) and turn signal lamp bulb (A) from the
lamp assembly.
|
[Bulb (Low Beam)]
| 1. |
Turn the head lamp power off.
|
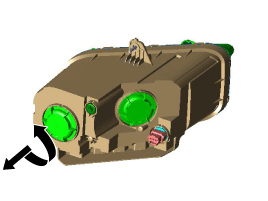
| 2. |
Remove the bulb caps from the head lamp assembly after turning in
the counter clock-wise direction.
|
| 3. |
Remove the head lamp low beam bulb after removing the socket from
the head lamp assembly.
|
[Bulb (High Beam)]
| 1. |
Turn the head lamp power off.
|
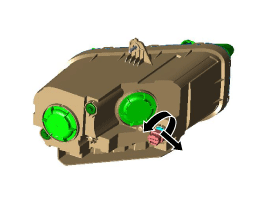
| 2. |
Remove the bulb caps from the head lamp assembly after turning in
the counter clock-wise direction.
|
| 3. |
Remove the head lamp high beam bulb after disengaing the retaining
clip and disconnect the lamp connector.
|
 Head Lamps Description and operation
Description
1.
Bulb
(1)
Elements
Xenon gas : Xenon gas activates the initial reaction for
rapid il ...
 Back-up Lamps Repair procedures
Removal
LHD
1.
Disconnect the negative (-) battery terminal.
2.
Remove the rear bubper.
(Refer to Body ...
Other information:
Hyundai Kona (OS) 2018-2026 Service Manual: Description and operation
System Overview
PDW-R (Parking Distance Warning- Revers) is an electronic driving aid that
warns the driver to be cautious while parking or driving at low speed. The
sensor uses ultrasonic waves to detect objects within proximity of the vehicle.
PDW-R consists of ...
Hyundai Kona (OS) 2018-2026 Service Manual: Injector Specifications
Specification
Item
Specification
Coil Resistance (Ω)
1.5 ± 0.075 [20°C (68°F)]
...
© 2018-2026 www.hkona.com


