Hyundai Kona: Heater / Heater Unit Repair procedures
Hyundai Kona (OS) 2018-2026 Service Manual / Heating, Ventilation and Air Conditioning / Heater / Heater Unit Repair procedures
| Replacement |
|

| 1. |
Disconnect the negative (-) battery terminal.
|
| 2. |
Recover the refrigerant with a recovery / recycling / charging station.
|
| 3. |
When the engine is cool, drain the engine coolant from the radiator.
(Refer to Engine Mechanical System - "Coolant")
|
| 4. |
Remove the engine cover.
(Refer to Engine Mechanical System - "Engine Cover")
|
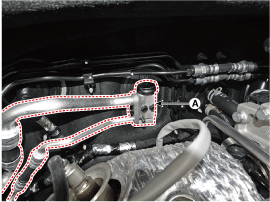
| 5. |
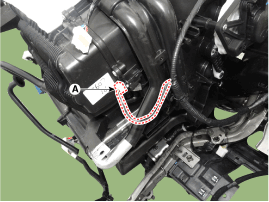
Remove the bolts and the expansion valve (A) from the evaporator
core.
|

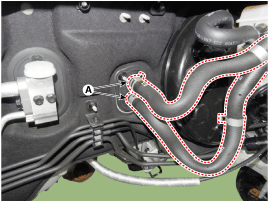
| 6. |
Disconnect the heater hoses (A) from the heater unit.
|
| 7. |
Loosen the cowl cross member mounting bolts.
|
| 8. |
Remove the floor console assembly.
(Refer to Body - "Floor Console Assembly")
|
| 9. |
Remove the crash pad lower panel.
(Refer to Body - "Crash Pad Lower Panel")
|
| 10. |
Remove both sides of the front pillar trim.
(Refer to Body - "Front Pillar Trim")
|
| 11. |
Remove the cowl side trim.
(Refer to Body - "Cowl Side Trim")
|
| 12. |
Remove the steering column shroud lower panel.
(Refer to Body - "Steering Column Shroud Panel")
|
| 13. |
Remove the steering wheel.
(Refer to Steering System - "Steering Wheel")
|
| 14. |
Remove the multifunction switch.
(Refer to Body Electrical System - "Multifunction Switch")
|
| 15. |
Lower the steering column after loosening the mounting bolts.
(Refer to Steering System - "Steering Column and Shaft")
|
| 16. |
Remove the shift lever assembly.
(Refer to Automatic Transmission System - "Shift Lever")
|
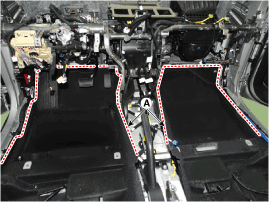
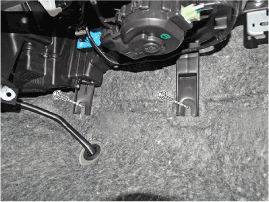
| 17. |
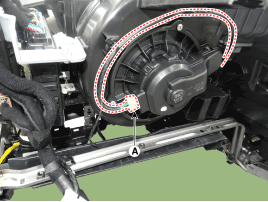
Separate the floor carpet (A) to obtain space for removing the rear
heating duct.
|
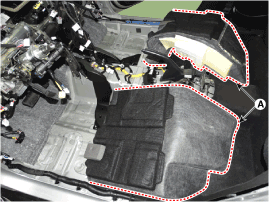
| 18. |
Loosen the mounting nut and remove the rear air duct (A).
|
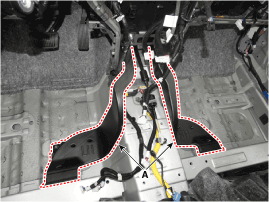
| 19. |
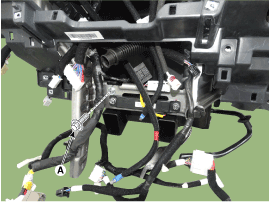
Disconnect the airbag control module (SRSCM) connector (A).
|
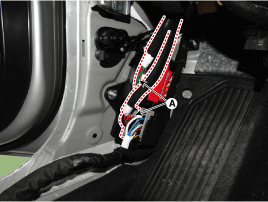
| 20. |
Disconnect the junction box connectors (A).
|
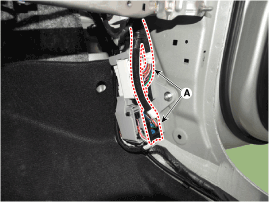
| 21. |
Disconnect the multi box connectors (A).
[Driver's side]
[Passenger's side]
|
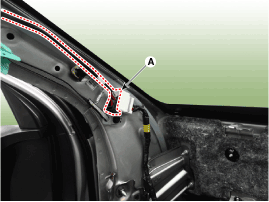
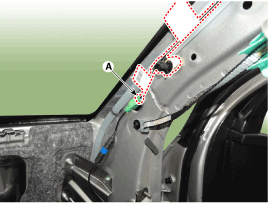
| 22. |
Disconnect the connectors (A) and the mounting clips in the front
pillar.
[Driver's side]
[Passenger's side]
|
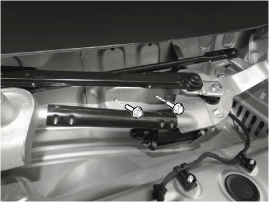
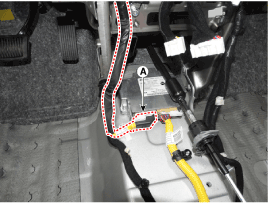
| 23. |
Loosen the blower unit mounting bolts.
|
| 24. |
Remove the drain hose (A).
|
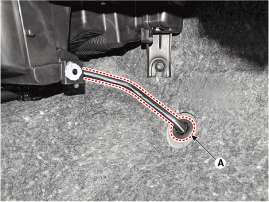
| 25. |
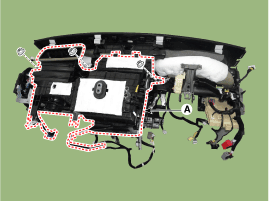
After loosening the bolts and nuts remove the main crash pad and
cowl cross bar assembly (A) together.
|
| 26. |
Disconnect the heater & blower unit connectors.
[Driver's side]
[Passenger's side]
|
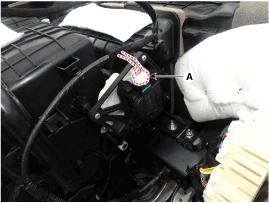
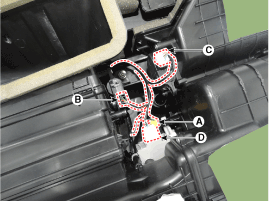
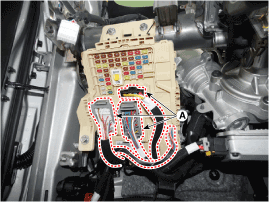
| 27. |
Loosen the heater & blower unit mounting bolt (A).
|
| 28. |
Remove the heater and blower unit (A) from the crash pad (B) after
loosening the mounting nuts.
|
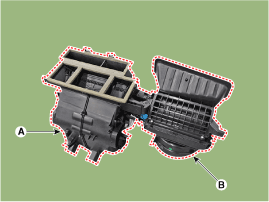
| 29. |
Separate the blower unit (A) from the heater unit (B) after loosening
the screws.
|
| 30. |
To install, reverse the removal procedure.
|
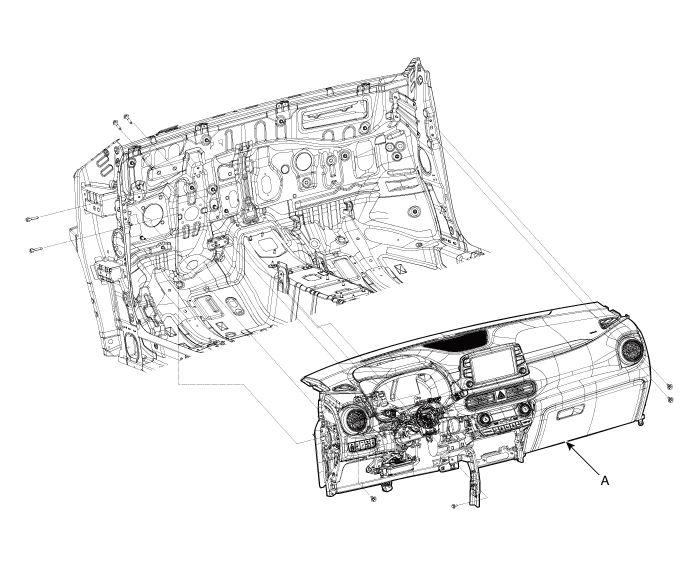
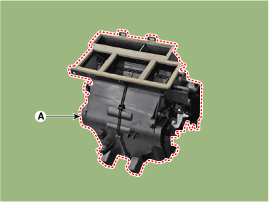
 Heater Unit Components and components location
Component Location
1. Heater unit assembly
Compoents
1. Mode control actuator
2. PTC Heat ...
 Heater Core Repair procedures
Replacement
1.
Disconnect the negative (-) battery terminal.
2.
Remove the heater and blower assembly.
(Refer ...
Other information:
Hyundai Kona (OS) 2018-2026 Service Manual: Components and positions
Components
1. Wireless power charging
unit
2. Wireless power charging
lamp
...
Hyundai Kona (OS) 2018-2026 Owners Manual: Disc brakes wear indicator
When your brake pads are worn and new pads are required, you will hear a high
pitched warning sound from your front or rear brakes. You may hear this sound come
and go or it may occur whenever you depress the brake pedal.
Note that some driving conditions or climates may cause a brake squeal when ...
© 2018-2026 www.hkona.com
