Hyundai Kona: Intake and Exhaust System / Muffler Repair procedures
Hyundai Kona (OS) 2018-2026 Service Manual / Engine Mechanical System / Intake and Exhaust System / Muffler Repair procedures
| Removal and Installation |
Front Muffler
| 1. |
Remove the engine cover.
(Refer to Engine and Transaxle Assembly - "Enginer Cover")
|
| 2. |
Disconnect the battery negative terminal.
|
| 3. |
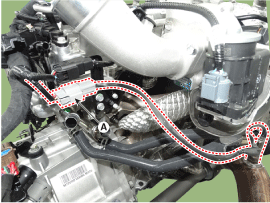
Disconnect the rear oxygen sensor connector (A).
|
| 4. |
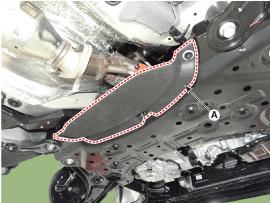
Remove the front muffler heat protector (A).
|
| 5. |
Remove the front muffler (A).
|
| 6. |
Install in the reverse order of removal.
|

GPF
| 1. |
Disconnect the battery negative terminal.
|
| 2. |
Remove the exhaust gas temperature sensor (EGTS) #1,#2.
(Refer to Engine Control / Fuel System - "Exhaust Gas Temperature Sensor
(EGTS)")
|
| 3. |
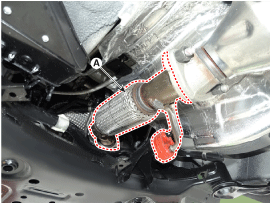
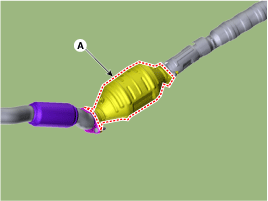
Remove the GPF (A).
|
| 4. |
Install in the reverse order of removal.
|
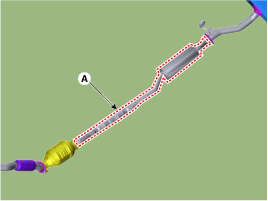
Center Muffler
| 1. |
Remove the center muffler (A).
|
| 2. |
Install in the reverse order of removal.
|
Rear Muffler
| 1. |
Remove the rear muffler (A).
|

| 2. |
Install in the reverse order of removal.
|
 Muffler Components and components location
Components
1. Front
muffler
2. GPF
3. Center muffler
4. Rear
muffler
5. Gasket
6. Hanger
...

Other information:
Hyundai Kona (OS) 2018-2026 Service Manual: Rear Seat Back Cover Components and components location
Component Location
1. Rear seat back cover [LH]
2. Rear seat back cover [RH]
...
Hyundai Kona (OS) 2018-2026 Service Manual: Blower Unit Components and components location
Component Location
1. Blower unit assembly
Components
1. Intake seal
2. Intake duct case
3. Intake actuator
4. Intake door
5. Intake lower case
6. Air filter
7. Air filter co ...
© 2018-2026 www.hkona.com
