Hyundai Kona: Cooling System / Radiator Repair procedures
Hyundai Kona (OS) 2018-2026 Service Manual / Engine Mechanical System / Cooling System / Radiator Repair procedures
| Removal and Installation |
| 1. |
Loosen the drain plug, and drain the coolant and remove the radiator
cap to speed draning.
(Refer to Cooling System - "Coolant")
|
| 2. |
Remove the cooling fan.
(Refer to Cooling System - "Cooling Fan")
|
| 3. |
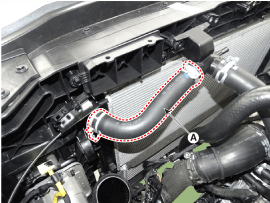
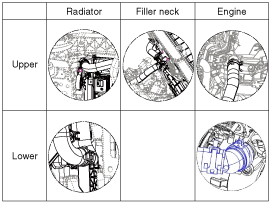
Remove the radiator upper hose (A).
|
| 4. |
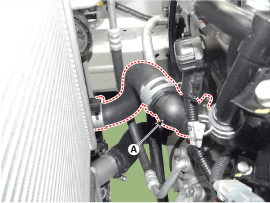
Remove the radiator lower hose (A).
|
| 5. |
Remove the front bumper.
(Refer to Body (Interior and Exterior) - "Front Bumper")
|
| 6. |
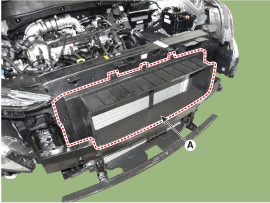
Remove the radiator air guard (A).
|
| 7. |
Remove the intercooler.
(Refer to Intake and Exhaust System - "Intercooler")
|
| 8. |
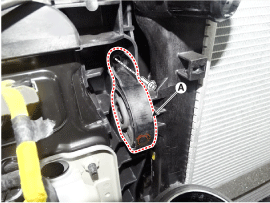
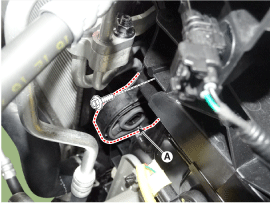
Remove the radiator upper bracket bolts (A).
[LH]
[RH]
|
| 9. |
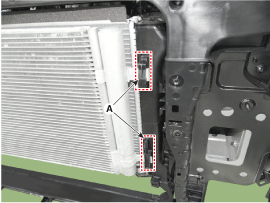
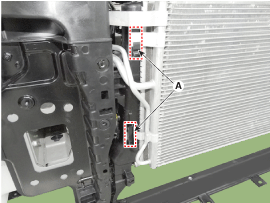
Disconnect the condenser (A) from radiator.
[LH]
[RH]
|
| 10. |
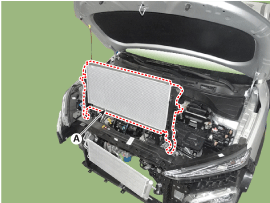
Pull the radiator (A) upward and remove it from engine room.
|
| 11. |
Install in the reverse order of removal.
|
| 12. |
Fill the radiator with coolant.
(Refer to cooling system - "Coolant")
|
| 13. |
Run engine and check for leaks.
|
| 14. |
Recheck engine coolant level.
|
| Inspection |
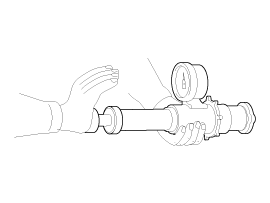
Radiator Cap Testing
| 1. |
Remove the radiator cap, wet its seal with engine coolant, and then
install it on a pressure tester.
|
| 2. |
Apply a pressure of 93.16-122.58kpa (0.95-1.25kg/cm², 13.51-17.78psi).
|
| 3. |
Check for a drop in pressure.
|
| 4. |
If the pressure drops, replace the cap.
|
 Radiator Components and components location
Components
1. Radiator Assembly
2. Radiator upper mounting bracket
3. Filler neck assembly
4. Radiator lower hose
5. Radiator upper hose
6. Radiato ...
 Reservoir Tank Repair procedures
Removal and Installation
1.
Loosen the drain plug and drain the coolant and remove the radiator
cap to speed draining.
(Refer to Cooling System - "Coo ...
Other information:
Hyundai Kona (OS) 2018-2026 Service Manual: Components and components location
Components
1. Front strut assembly
2. Driveshaft
3. Steering gearbox
4. Front lower arm
5. Front sub frame
6. Front stabilizer bar
7. Front knuckle assembly
...
Hyundai Kona (OS) 2018-2026 Service Manual: Liftgate Assembly Components and components location
Component Location
1. Liftgate assembly
...
© 2018-2026 www.hkona.com

