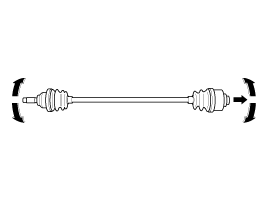
Hyundai Kona: Rear Driveshaft Assembly / Rear Driveshaft Repair procedures
Hyundai Kona (OS) 2018-2026 Service Manual / Driveshaft and axle (2WD-FF) / Rear Driveshaft Assembly / Rear Driveshaft Repair procedures
| Removal |
| 1. |
Loosen the wheel nuts slightly.
Raise the vehicle, and make sure it is securely supported.
|
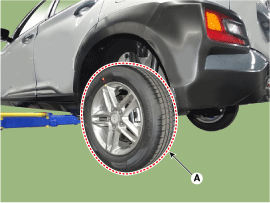
| 2. |
Remove the rear wheel and tire (A) from rear hub.
|

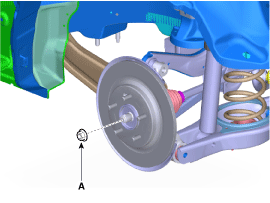
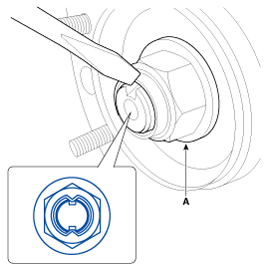
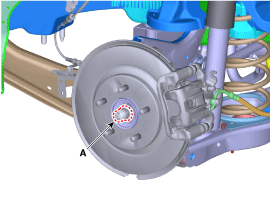
| 3. |
Remove the driveshaft caulking nut (A).
|
| 4. |
Remvoe the trailing arm (A) from the rear carrier assembly.
|
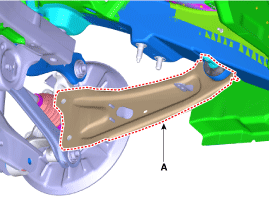
| 5. |
Remove the upper arm (A) after loosening the bolt and nut.
|
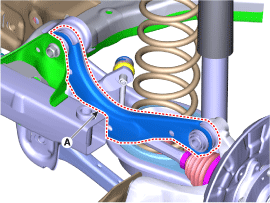
| 6. |
Remove the assist arm (A) after loosening the bolt and nut.
|
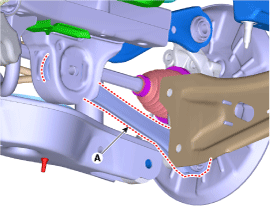
| 7. |
Loosen the bolt and nut (A) and then separate the rear lower arm assembly.
|

| 8. |
Disconnect the driveshaft (A) from the rear carrier assembly.
|
| 9. |
Insert a pry bar between the differential case and joint case, and separate
the driveshaft from the differential case.
|
| Inspection |
| 1. |
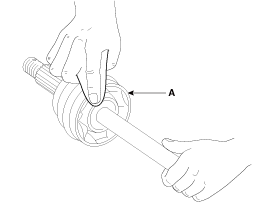
Check the driveshaft boots for damage and deterioration.
|
| 2. |
Check the ball joint for wear and damage.
|
| 3. |
Check the splines for wear and damage.
|
| 4. |
Check the driveshaft for cracks and wears.
|
| 5. |
Check the TJ outer race, inner race, cage and balls for rust or damage.
|
| 6. |
Check for water, foreign matter, or rust in the BJ boot.
|
| Installation |
| 1. |
Install in the reverse order of removal.
|
| 2. |
Check the alignment.
(Refer to Suspension System - "Alingment")
|
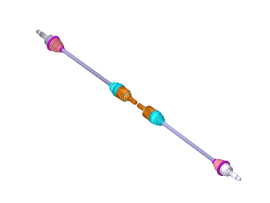
 Rear Driveshaft Components and components location
Components
1. Rear drive shaft (LH)
2. Coupling assembly
3. Rear differential carrier assembly
4. Rear drive shaft (RH)
5. Propeller shaft assembly
...

Other information:
Hyundai Kona (OS) 2018-2026 Service Manual: Audio Remote Control Repair procedures
Inspection
1.
Check for resistance between terminals in each switch position (LH).
[LH : Audio + Hands free]
Switch
Connector
terminal
Resistance
(±5%)
...
Hyundai Kona (OS) 2018-2026 Service Manual: Specifications
Specifications
Fuel Delivery System
Items
Specification
Fuel Tank
Capacity
50 lit. (13.2 U.S.gal., 52.8 U.S.qt., 44.0 Imp.qt.)
Fuel Filter
Type
Paper type
Fuel ...
© 2018-2026 www.hkona.com
