Hyundai Kona: Air Conditioning System / Receiver-Drier Repair procedures
Hyundai Kona (OS) 2018-2026 Service Manual / Heating, Ventilation and Air Conditioning / Air Conditioning System / Receiver-Drier Repair procedures
| Replacement |
| 1. |
Remove the condenser.
|
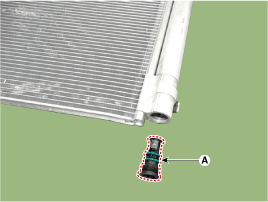
| 2. |
Remove the cap (A) on the bottom of the condenser with a L wrench.
|
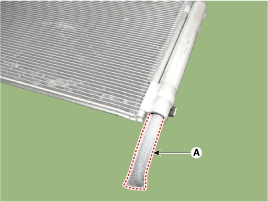
| 3. |
Remove the receiver-drier (A) from condenser using a long nose plier.
Check for crumbled receiver-drier and clogged bottom cap filter.
|
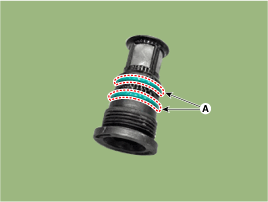
| 4. |
Apply air conditioning compressor oil along the O-rings and threads
of the new bottom cap.
|
| 5. |
Insert a new receiver-drier into the receiver drier tank. The receiver-drier
must be sealed in vacuum before it is exposed to air for use.
|
| 6. |
Install a new bottom cap to the condenser.
|

 Condenser Repair procedures
Inspection
1.
Check the condenser fins for clogging and damage. If clogged, clean
them with water, and blow them with compressed air. If bent, gently
...
 A/C Pressure Transducer Description and operation
Description
The A/C Pressure Transducer (APT) converts the pressure value of high pressure
line into voltage value after measuring it. By converted voltage value,
engine ...
Other information:
Hyundai Kona (OS) 2018-2026 Service Manual: Inhibitor Switch Description and operation
Description
•
Components location : DCT (Dual Clutch Transmission)
•
Function
- The inhibitor switch mounted on the upper of transmission and connected
with shifter lever.
- The inhibitor switch has fou ...
Hyundai Kona (OS) 2018-2026 Service Manual: Radiator Components and components location
Components
1. Radiator Assembly
2. Radiator upper mounting bracket
3. Filler neck assembly
4. Radiator lower hose
5. Radiator upper hose
6. Radiator lower mounting insulator
7. Radiator air guard
...
© 2018-2026 www.hkona.com
