Hyundai Kona: Rear Door / Repair procedures
Hyundai Kona (OS) 2018-2026 Service Manual / Body (Interior and Exterior) / Rear Door / Repair procedures
| Adjustment |
Glass Adjustment
|

| 1. |
Remove the rear door trim.
(Refer to Rear Door - "Rear Door Trim")
|
| 2. |
After loosening the mounting screws, remove the rear door full handle
mounting support (A).
|
| 3. |
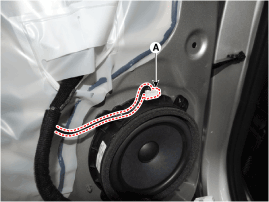
Disconnect the rear door speaker connector (A).
|
| 4. |
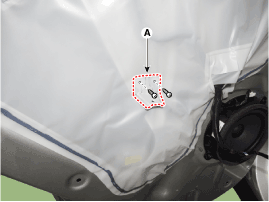
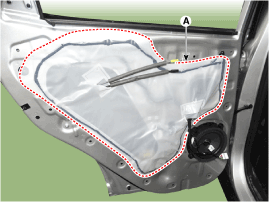
Remove the rear door trim seal (A).
|
| 5. |
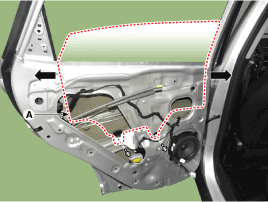
After loosening the glass mounting bolts, adjust the spacing of the
glass (A) by moving the glass from side to side and then tighten the
bolts.
|
| 6. |
Check the glass for normal operation.
|
Door Striker Adjustment
|
| 1. |
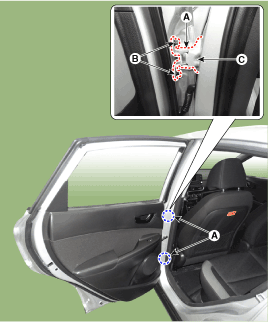
After loosening the mounting screw, adjust the striker (A) by moving
it forward and backward or from side to side and then tighten the bolts
(B).
|
| 2. |
Tap on the striker with a plastic hammer to adjust the striker. The
striker will not move much, but will give some adjustment.
|
| 3. |
Hold the outer handle out, and push the door against the body to make
sure that the striker fits flush with the body. If the door latches
properly, tighten the screws and recheck.
|
Door Position Adjustment
|
| 1. |
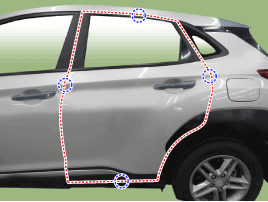
Check that the door and body edges are parallel.
|
| 2. |
Place the vehicle on a firm, level surface when adjusting the doors.
|
| 3. |
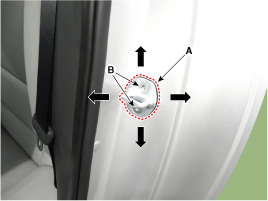
Adjust the hinges (A) :
|
| 4. |
Grease the pivot portions of the hinges indicated by the arrows.
|
| 5. |
Check for water leaks.
|
 Components and components location
Components
1. Rear door trim
2. Rear door full handle mounting support
3. Rear door trim seal
4. Rear door hinge
5. Rear door quadrant inner cover
6. Rear ...
 Rear Door Trim Components and components location
Component Location
1. Rear door trim
...
Other information:
Hyundai Kona (OS) 2018-2026 Service Manual: Direct Electro Hydraulic Actuator Coupling Repair procedures
Inspection
•
All units are filled up with coupling fluid (ultra-low viscosity
ATF) prior to shipping. Inspection, fill-up, and replacement
of coupling fluid is therefore n ...
Hyundai Kona (OS) 2018-2026 Service Manual: Front Wheel Speed Sensor Components and components location
Components
1. Front wheel speed sensor
2. Front wheel speed sensor connector
...
© 2018-2026 www.hkona.com
