Hyundai Kona: Audio / Audio Unit Repair procedures
Hyundai Kona (OS) 2018-2026 Service Manual / Body Electrical System / Audio / Audio Unit Repair procedures
| Removal |
| 1. |
Disconnect the negative (-) battery terminal.
|
| 2. |
Remove the center fascia panal.
(Refer to Body - "Center Fascia Panal")
|
| 3. |
Remove the crashpad garnish.
(Refer to Body - "Crashpad garnish assembly")
|
| 4. |
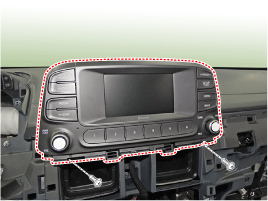
Remove the audio head unit after loosening the screws.
|
| 5. |
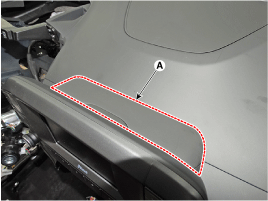
Remove the audio upper cover (A).
|
| 6. |
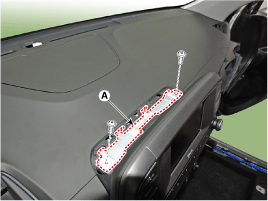
Remove the audio mounting bracket (A).
|
| 7. |
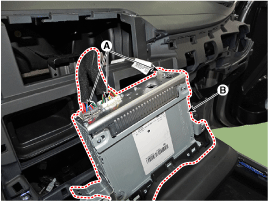
Remove the audio head unit (B) after disconnecting the connectors and
cable (A).
|
| Installation |
| 1. |
Connect the audio unit connectors and cable.
|
| 2. |
Install the audio head unit.
|
| 3. |
Install the center fascia panal.
|
| 4. |
Connect the negative (-) battery terminal.
|
 Audio Unit Components and components location
Components
[RADIO/MP3]
Connector Pin Information
NO
Connector A
Connector B
Connector C
Connector D
...
 Speakers Repair procedures
Inspection
1.
Troubleshooting for Speaker
(1)
Basic inspection of speaker
Inspect the sound from speaker after verifying tha ...
Other information:
Hyundai Kona (OS) 2018-2026 Service Manual: SRSCM Components and components location
Components
1. Front right Pressure Impact
Sensor (FIS)
2. Supplemental Restraint System Control Module (SRSCM)
3. Front left Pressure Impact Sensor (FIS)
4. Pressure Side Impact Sensor
(P-SIS
5. Gravity Side Impact Sensor (G-SIS)
...
Hyundai Kona (OS) 2018-2026 Service Manual: Repair procedures
Service Adjustment Procedure
Steering Wheel Play Inspection
1.
Turn the steering wheel so that the front wheels can face straight ahead.
2.
Measure the distance the steering wheel can be turned without moving
the front wheels. ...
© 2018-2026 www.hkona.com


