Hyundai Kona: Brake System / Brake Pad Repair procedures
Hyundai Kona (OS) 2018-2026 Service Manual / Brake System / Brake System / Brake Pad Repair procedures
| Replacement |
Front Brake Pad
| 1. |
Loosen the wheel nuts slightly.
Raise the vehicle, and make sure it is securely supported.
|
| 2. |
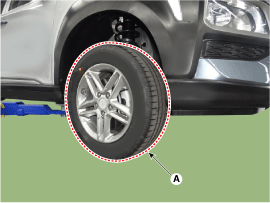
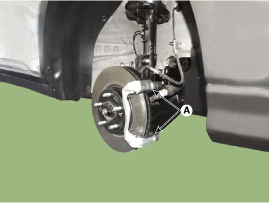
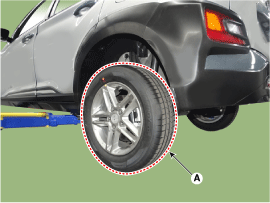
Remove the front wheel and tire (A) from front hub.
|

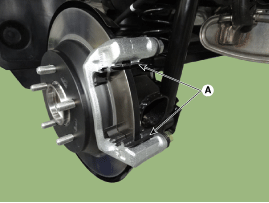
| 3. |
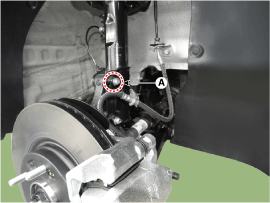
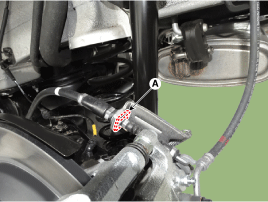
Remove the parking brake cable fixing clip (A).
|
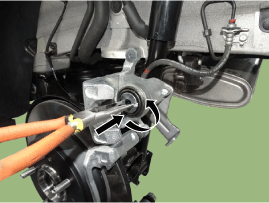
| 4. |
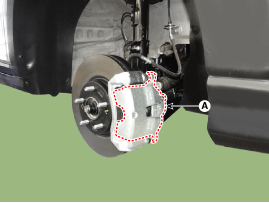
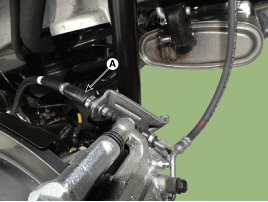
Down the caliper body (A) by loosening the guided rod bolt.
|
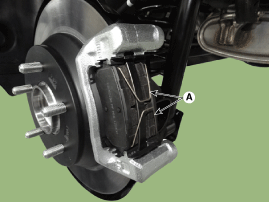
| 5. |
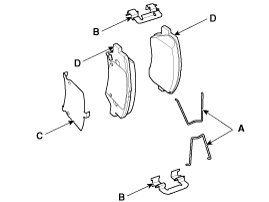
Remove the pad return spring (A).
|
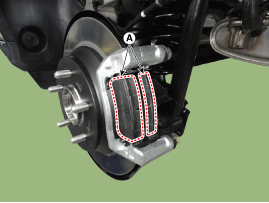
| 6. |
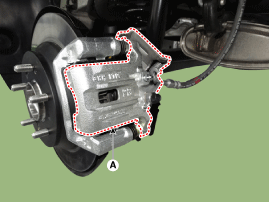
Remove the brake pad (A).
|

| 7. |
Replace the pad retainer (A) with a new one.
|
| 8. |
Replace the brake pad (A) with a new one.
|
| 9. |
Install the pad return spring (A).
|
| 10. |
Apply The Anti-noise grease. (Only Front 17" Brake)
|
| 11. |
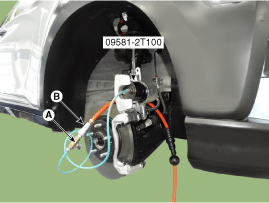
Use a SST (09581-2T100) when installing the brake caliper assembly.
|
| 12. |
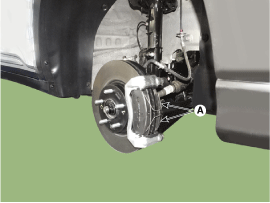
Install the caliper body (A) then tighten the guide rod bolt.
|
| 13. |
Install the front wheel and tire (A).
|
Rear Brake Pad
| 1. |
Loosen the wheel nuts slightly.
Raise the vehicle, and make sure it is securely supported.
|
| 2. |
Remove the rear wheel and tire (A) from the rear hub.
|
| 3. |
Remove the parking brake cable fixing clip (A).
|
| 4. |
Pull the operation lever as a clock-wise direction and then remove the
parking cable (A) from the caliper.
|
| 5. |
Up the caliper body (A) by loosening the guided rod bolt.
|
| 6. |
Remove the pad return spring (A).
|
| 7. |
Remove the brake pad (A).
|
| 8. |
Replace the pad retainer (A) with a new one.
|
| 9. |
Replace the brake pad (A) with a new one.
|
| 10. |
Install the pad return spring (A).
|
| 11. |
Install the caliper body (A) and then tighten the guide rod bolt.
|
| 12. |
Install the caliper body (A) then tighten the guide rod bolt.
|
| 13. |
Pull the operation lever as a clock-wise direction and install the parking
cable (A) from the caliper.
|
| 14. |
Install the parking brake cable fixing clip (A).
|
| 15. |
Install the wheel and tire (A).
|
| Inspection |
Front Brake Pad Check
| 1. |
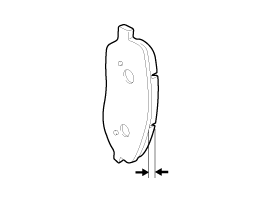
Check the pad wear. Measure the pad thickness and replace it, if it
is less than the specified value.
|
| 2. |
Check that grease is applied, to sliding contact points and the pad
and backing metal for damage.
|
Rear Brake Pad Check
| 1. |
Check the pad wear. Measure the pad thickness and replace it, if it
is less than the specified value.
|
| 2. |
Check the damage of pad, backing metal and contamination with grease.
|
 Rear Disc Brake Repair procedures
Removal
1.
Loosen the wheel nuts slightly.
Raise the vehicle, and make sure it is securely supported.
2.
Remove the rear wheel and ...
 Stop Lamp Switch Components and components location
Components
1. Stop lamp switch
2. Brake pedal arm assembly
3. Brake member assembly
4. Return spring
...
Other information:
Hyundai Kona (OS) 2018-2026 Service Manual: Fuel Pump Repair procedures
Inspection
1.
Turn the ignition switch OFF, and then remove battery (-) terminal.
2.
Remove the fuel pump assembly.
3.
Using an ohmmeter, measure the resistance between terminals 1 and 6
of sender conn ...
Hyundai Kona (OS) 2018-2026 Service Manual: Glove Box Housing Cover Components and components location
Component Location
1. Glove box housing cover
...
© 2018-2026 www.hkona.com
