Hyundai Kona: Cylinder Head Assembly / CVVT & Camshaft Repair procedures
Hyundai Kona (OS) 2018-2026 Service Manual / Engine Mechanical System / Cylinder Head Assembly / CVVT & Camshaft Repair procedures
| Removal |
| 1. |
Remove the cylinder head cover.
(Refer to Cylinder Head Assembly - "Cylinder Head Cover")
|
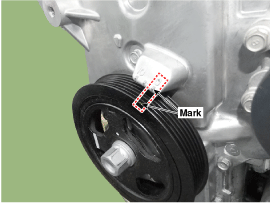
| 2. |
Turn the crankshaft damper pulley so that No. 1 piston is at top dead
center.
|

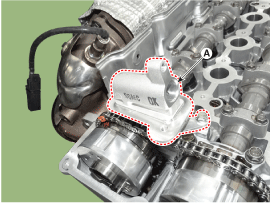
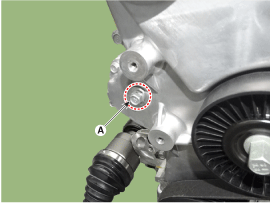
| 3. |
Remove the exhaust oil control valve (OCV) adaptor (A).
|
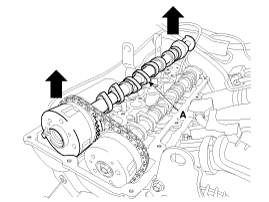
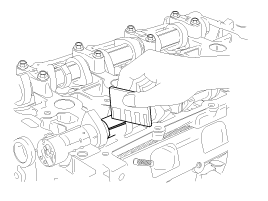
| 4. |
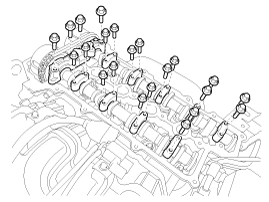
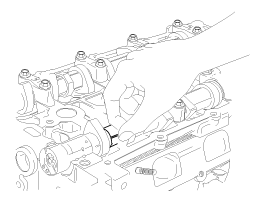
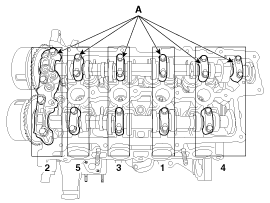
Remove the camshaft bearing caps (A) in the order shown in the picture.
|
| 5. |
Remove the engine mounting support bracket.
|
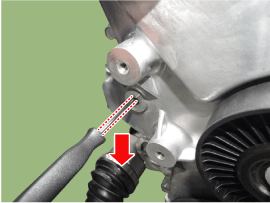
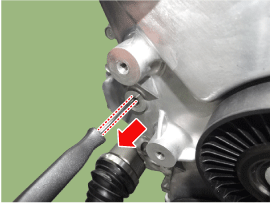
| 6. |
Remove the service hole bolt (A).
|
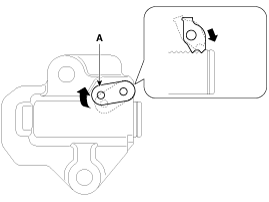
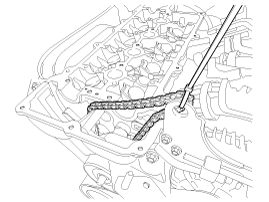
| 7. |
Lock the timing chain tensioner in the fully retracted position.
|

| 8. |
Separate the exhaust camshaft (A) from the exhaust CVVT by removing
the bolt.
|

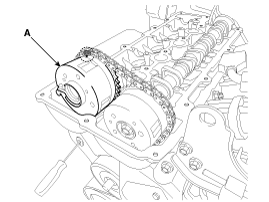
| 9. |
Remove the exhaust CVVT (A) from the timing chain.
|
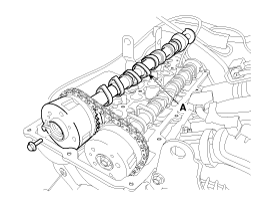
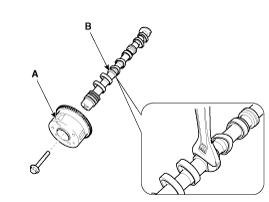
| 10. |
Remove the intake CVVT & camshaft (A).
|
| 11. |
Remove the intake CVVT (A) from the intake camshaft (B).
|
| Inspection |
Camshaft
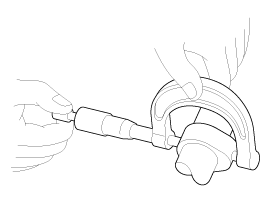
| 1. |
Measure the height of the cam lobe using a micrometer and check the
surface of the cam lob for wear and tear. If necessary, replace the
camshaft.
|
| 2. |
Inspect the cam lobe surface for abnormal wear and damage and replace
if necessary.
|
| 3. |
Check the surface of the camshaft journal for wear and tear. If the
camshaft journal is excessively damaged, replace the camshaft.
|
| 4. |
Inspect the camshaft journal clearance.
|
| 5. |
Inspect the camshaft end play.
|
CVVT (Continuously Variable Valve Timing) Assembly
| 1. |
Inspect the CVVT for smooth rotation.
|
| Installation |
| 1. |
Install the intake CVVT (A) to the intake camshaft.
|
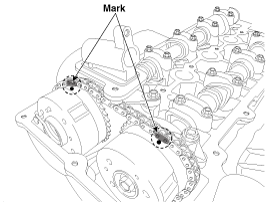
| 2. |
Install the intake CVVT & camshaft (A), with the timing mark on the
intake CVVT sprocket aligned with the mark (painted link) on the timing
chain.
|
| 3. |
Install the exhaust CVVT (A), with the timing mark on the exhaust CVVT
sprocket aligned with the mark (painted link) on the timing chain.
|
| 4. |
Install the exhaust camshaft (A) to the exhaust CVVT.
|
| 5. |
Remove the pick from the service hole in the timing chain cover.
|
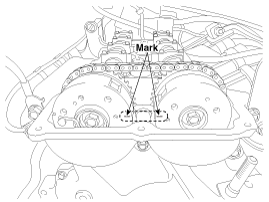
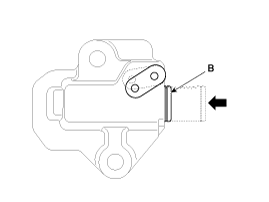
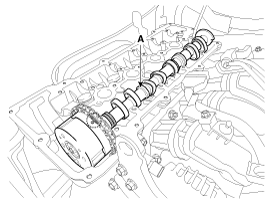
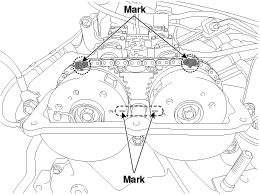
| 6. |
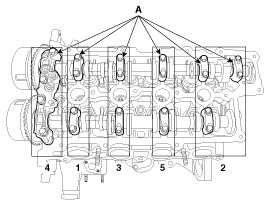
Check that each timing mark of the intake and exhaust CVVT sprockets
is aligned as shown in the picture.
|
| 7. |
Install the bolt (A) to the service hole in the timing chain cover.
|
| 8. |
Install the engine mounting support bracket.
(Refer to Engine and Transaxle Assembly - "Engine Mounting")
|
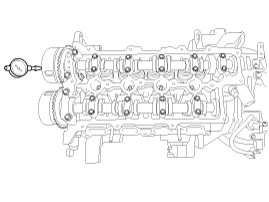
| 9. |
Install the camshaft bearing caps (A) in the order shown in the picture
and tighten the bolts to the specified torque.
|
| 10. |
Install the exhaust oil control valve (OCV) adaptor (A).
|
| 11. |
Install the cylinder head cover.
(Refer to Cylinder Head Assembly - "Cylinder Head Cover")
|
 CVVT & Camshaft Components and components location
Components
1. Exhaust camshaft
2. Intake camshaft
3. Exhaust CVVT
4. Intake CVVT
5. Camshaft bearing cap
6. Camshaft front bearing cap
7. O-ring
...
 Cylinder Head Components and components location
Components
1. Cylinder head assembly
2. MLA
3. Retainer lock
4. Retainer
5. Valve stem seal
6. Valve spring
7. Valve spring seat
8. OCV (Oil Cont ...
Other information:
Hyundai Kona (OS) 2018-2026 Service Manual: Cruise Control Switch Components and components location
Components
1. Left Remote Control Switch
(Audio + Hands free)
2. Right Remote Control Switch
(Cruise + Trip Computer)
...
Hyundai Kona (OS) 2018-2026 Service Manual: Sunroof Assembly Components and components location
Components Location
1. Sunroof assembly
...
© 2018-2026 www.hkona.com
