
Hyundai Kona: Driveshaft Assembly / Dynamic Damper Repair procedures
| Removal |
| 1. |
Remove the front driveshaft.
(Refer to Driveshaft Assembly - "Front Driveshaft")
|
| 2. |
Remove the TJ joint assembly.
(Refer to Driveshaft Assembly - "TJ Joint")
|
| 3. |
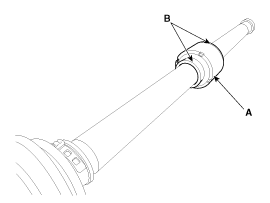
Remove the remove the both side of band (B) of the dynamic damper (A).
|
| 4. |
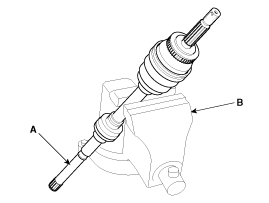
Fix the driveshaft (A) with a vice (B) as illustrated.
|
| 5. |
Apply soap powder on the shaft to prevent being damaged between the
shaft spline and the dynamic damper when the dynamic damper is removed.
|
| 6. |
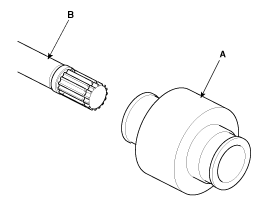
Seperate the dynamic damper (A) from the shaft (B) carefully.
|
| Installation |
| 1. |
Apply soap powder on the shaft to prevent being damaged between the
shaft spline and the dynamic damper.
|
| 2. |
Install the dynamic damper.
|
| 3. |
Install the dynamic damper band.
|
| 4. |
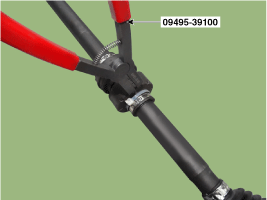
Using the SST(09495-39100), secure the TJ boot bands.
|

| 5. |
Install the TJ joint assembly.
(Refer to Driveshaft Assembly - "TJ Joint")
|
| 6. |
Install the front driveshaft.
(Refer to Driveshaft Assembly - "Front Driveshaft")
|
| 7. |
Check the front alignment.
(Refer to Suspension System - "Alignment")
|
 Dynamic Damper Components and components location
Components
1. BJ
assembly
2. BJ circlip
3. BJ boot band
4. BJ boot
5. Dynamic
damper band
6. Dynamic damper
7. Shaft
8. TJ boot band
...
 BJ Boot Components and components location
Components (1)
[Gamma 1.6 T-GDI, Nu 2.0 MPI]
1. BJ assembly
2. BJ circlip
3. BJ boot band
4. BJ boot
5. Dynamic damper band
6. Dynamic damper
7. ...
Other information:
Hyundai Kona (OS) 2018-2026 Owners Manual: Emergency tailgate safety release
Your vehicle is equipped with the emergency tailgate safety release lever located
on the bottom of the tailgate. When someone is inadvertently locked in the luggage
compartment. The tailgate can be opened by doing as follows:
1. Insert the key into the hole.
2. Push the release lever to the right ...
Hyundai Kona (OS) 2018-2026 Service Manual: Side Impact Sensor (SIS) Repair procedures
Removal
Pressure Side Impact Sensor
•
Removal of the airbag must be performed according to the precautions/procedures
described previously.
•
...
