Hyundai Kona: Floor Console / Floor Console Assembly Repair procedures
| Replacement |
|

|
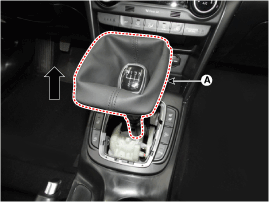
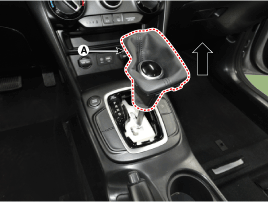
| 1. |
Remove the gear knob & boots (A) after turning in the counter clock-wise
direction.
|

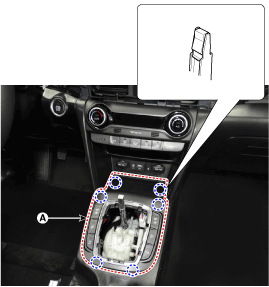
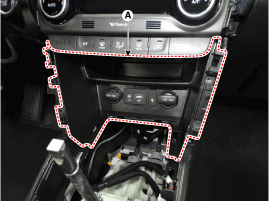
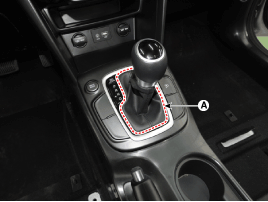
| 2. |
Using a screwdriver or remover, remove the console upper cover (A).
|
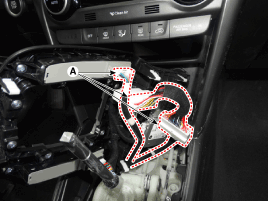
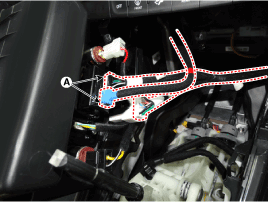
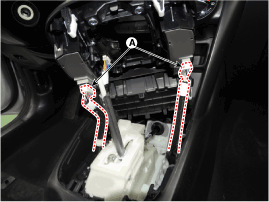
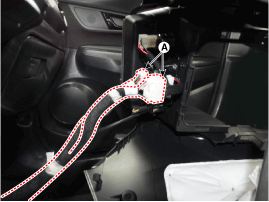
| 3. |
Disconnect the connector (A).
|
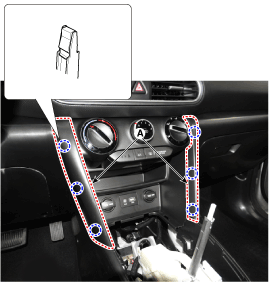
| 4. |
Using a remover, remove the console upper front garnish (A).
|
| 5. |
After loosening the mounting screws, remove the floor console tray assembly
(A).
|
| 6. |
Disconnect the connector (A).
|
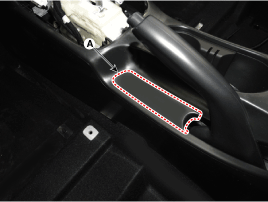
| 7. |
Using a screwdriver or remover, remove the parking brake cover (A).
|
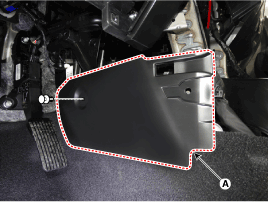
| 8. |
Remove the storage box pad (A).
|

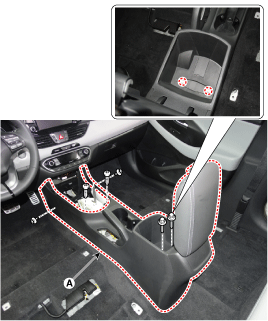
| 9. |
After loosening the mounting screws and bolts, remove the console rear
complete assembly (A).
|
| 10. |
After loosening the mounting clips, remove the floor console side cover
(A).
|
| 11. |
To install, reverse removal procedure.
|

|
|

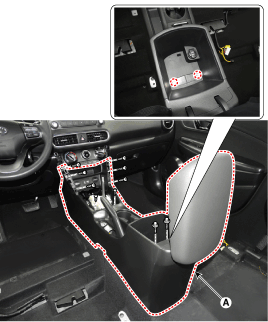
| 1. |
To remove the gear knob & gear boots (A) pull both of it up.
|
| 2. |
Using a screwdriver or remover, remove the floor console upper cover
(A).
|

| 3. |
Disconnect the connectors (A) from the floor console upper cover.
|
| 4. |
Using a remover, remove the console upper front garnish (A).
|
| 5. |
After loosening the mounting screws, remove the floor console tray assembly
(A).
|
| 6. |
Disconnect the connector (A).
|
| 7. |
Using a screwdriver or remover, remove the parking brake cover (A).
|
| 8. |
Remove the storage box pad (A).
|
| 9. |
After loosening the mounting screws and bolts, remove the floor console
assembly (A).
|
| 10. |
After loosening the mounting clips, remove the floor console side cover
(A).
|
| 11. |
To install, reverse removal procedure.
|
 Floor Console Assembly Components and components location
Component Location
[Manual console]
1. Floor console assembly
[Automatic console]
1. Floor console assembly
...
 Rear Console Cover Components and components location
Component Location
1. Rear console cover
...
Other information:
Hyundai Kona (OS) 2018-2026 Owners Manual: LKA operation
To activate/deactivate the LKA system:
With the ignition switch in the ON position, press the LKA system button located
on the instrument panel on the left hand side of the steering wheel. (Right hand
side of the steering wheel for RHD vehicles.)
The indicator in the cluster display will initiall ...
Hyundai Kona (OS) 2018-2026 Service Manual: Mode Control Actuator Repair procedures
Inspection
1.
Turn the ignition switch OFF.
2.
Disconnect the mode control actuator connector.
3.
Verify that the mode control actuator operates to the defrost mode
when connec ...
