Hyundai Kona: Parking Brake System / Parking Brake Lever Repair procedures
Hyundai Kona (OS) 2018-2026 Service Manual / Brake System / Parking Brake System / Parking Brake Lever Repair procedures
| Removal |
| 1. |
Turn ignition switch OFF and disconnect the battery negative (-) cable.
|
| 2. |
Release the parking brake.
|
| 3. |
Remove the floor console assembly.
(Refer to Body - "Floor Console")
|
| 4. |
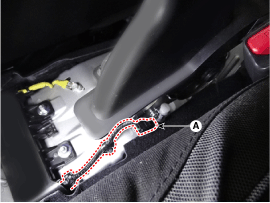
Disconnect the parking brake switch connector (A).
|
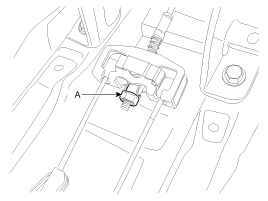
| 5. |
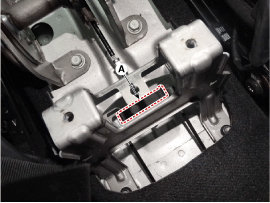
Remove the parking brake cable after removing the nut and cable retainer
(A).
|
| 6. |
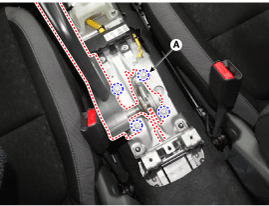
Remove the parking brake lever assembly (A) after loosening the bolts.
|
| Installation |
| 1. |
Install the parking brake lever assembly (A).
|
| 2. |
Install the parking cable and cable retainer (A).
|
| 3. |
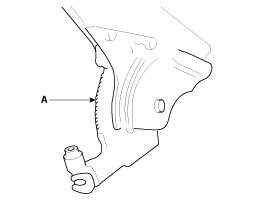
Apply a coating of the specified grease to each sliding parts (A) of
the ratchet plate or the ratchet pawl.
|
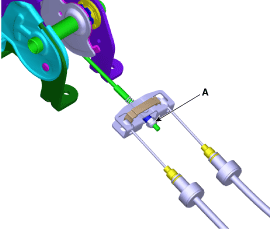
| 4. |
Install the parking brake cable adjuster, then adjust the parking brake
lever stroke by turning adjusting nut (A).
|
| Adjustment |
| 1. |
Remove the floor console assembly.
(Refer to Body - "Floor Console")
|
| 2. |
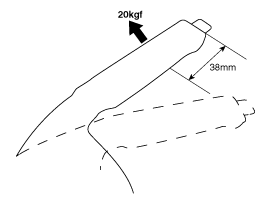
Apply the brake pedal 20 times with the force of 10kgf after bleeding.
Then, for the cable to settle in, apply the parking brake full stroke
more than 3 times.
|
| 3. |
Install the parking brake cable adjuster, then adjust the parking brake
lever stroke by turning adjusting nut (A).
|
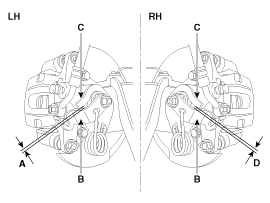
| 4. |
Tension the parking brake cable by tightening the adjusting nut, until
the operating levers on both calipers lift from the stop, up to a distance
of (A) and (D) between operating lever (B) and stopper (C).
|
| 5. |
Release the parking brake lever fully, and check that parking brakes
do not drag when the rear wheels are turned. Readjust if necessary.
|
| 6. |
Make sure that the parking brakes are fully applied when the parking
brake lever is pulled up fully.
|
| 7. |
Install the floor console.
(Refer to Body - "Floor Console")
|
 Components and components location
Components
1. Parking brake lever
2. Equalizer assembly
3. Parking brake cable
4. Brake disc
5. Brake caliper
...
 Parking Brake Switch Repair procedures
Removal
1.
Turn ignition switch OFF and disconnect the negative (-) battery cable.
2.
Release the parking brake.
3.
...
Other information:
Hyundai Kona (OS) 2018-2026 Service Manual: Rear Bumper beam Assembly Repair procedures
Replacement
•
Put on gloves to prevent hand injuries.
•
Wh ...
Hyundai Kona (OS) 2018-2026 Service Manual: Specifications
Specifications
Audio
Items
AUDIO
Model
RADIO/CD/MP3
Power supply
DC 14.4V
Parasitic current
Max. 1mA (Head unit only)
Antenna
80PF 75Ω
...
© 2018-2026 www.hkona.com

