Hyundai Kona: Charging System / Alternator Repair procedures
| Removal |
| 1. |
Turn ignition switch OFF and disconnect the battery negative (-) terminal.
|
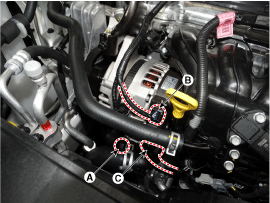
| 2. |
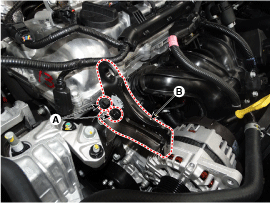
Disconnect the air compressor connector (A) and the alternator connector
(B), and remove the cable (C) from alternator "B" terminal.
|
| 3. |
Loose the alternator by loosening the mounting lower bolt (A) lightly,
not completely, to remove the drive belt.
|
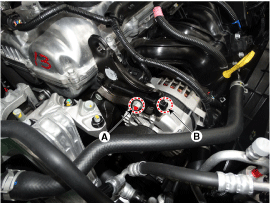
| 4. |
Loosen the mounting bolts (A) and then, turn the adjusting bolt (B)
clockwise to loosen tension.
|
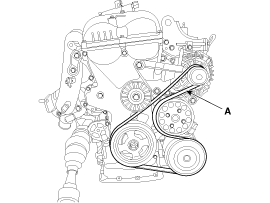
| 5. |
Remove the drive belt (A).
|
| 6. |
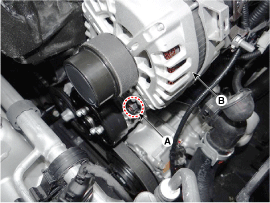
Remove the alternator brace bracket assembly (B) after loosening the
mounting bolt (A).
|
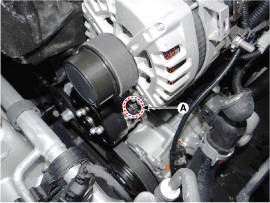
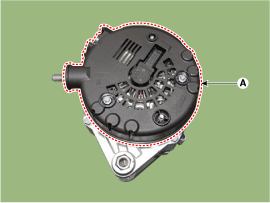
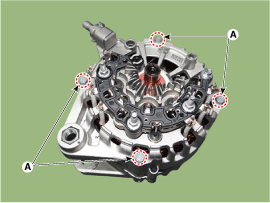
| 7. |
Remove the alternator mounting low bolt (A), and then remove the alternator
(B).
|
| Installation |
| 1. |
Install in the reverse order of removal.
|
| 2. |
Adjust the alternator belt tension after installation.
(Refer to Engine Mechanical System - "Drive Belt")
|
| Disassembly |
| 1. |
Remove the alternator.
(Refer to Charging System - "Alternator")
|
| 2. |
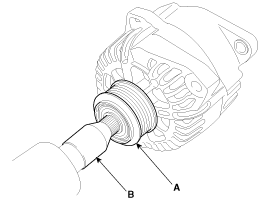
Remove the OAD (Overrunning Alternator Decoupler) cap (A).
|

| 3. |
Remove the OAD(Overrunning Alternator Decoupler) pulley (A) using the
special tool.
|
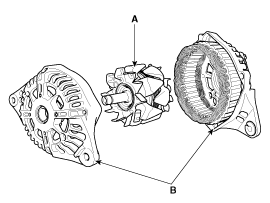
| 4. |
Remove the rear cover (A) after removing nuts.
|
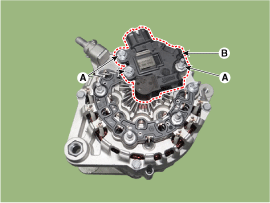
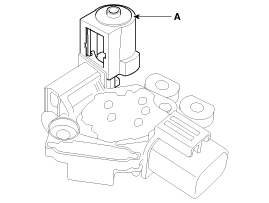
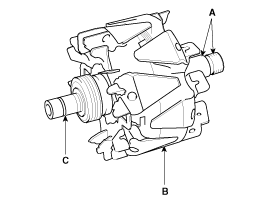
| 5. |
Remove the mounting bolts (A) and the regulator assembly (B).
|
| 6. |
Remove the slip ring guide (A) after pulling it.
|
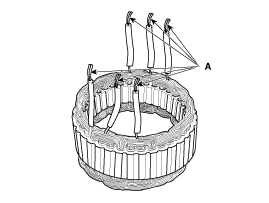
| 7. |
Unsolder the 3 stator leads (A).
|
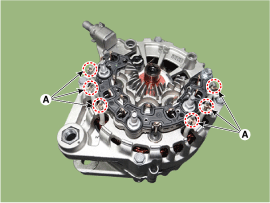
| 8. |
Remove the 4 through bolts (A).
|
| 9. |
Disconnect the rotor (A) and bracket (B).
|
| Reassembly |
| 1. |
Check that there is continuity between the slip rings (C).
|
| 2. |
Check that there is no continuity between the slip rings and the rotor
(B) or rotor shaft (A).
|
| 3. |
If the rotor fails either continuity check, replace the alternator.
|
| 1. |
Check that there is continuity between each pair of leads (A).
|
| 2. |
Check that there is no continuity between each lead and the coil core.
|
| 3. |
If the coil fails either continuity check, replace the alternator.
|
 Alternator Components and components location
Components
1. OAP (Overrunning Alternator
Pulley)
2. Front bracket
3. Front bearing
4. Stator
5. Rotor
6. Rear Bearing
7. Rear Bracket
8. Bru ...
 DC/DC Converter Description and operation
Description
Due to the considerably more frequent occurrence of starting operations, the
electrical load that occurs often leads to voltage dips in the vehicle network.
In order ...
Other information:
Hyundai Kona (OS) 2018-2026 Owners Manual: 2. Evaporative emission control system
The Evaporative Emission Control System is designed to prevent fuel vapors from
escaping into the atmosphere.
Canister
Fuel vapors generated inside the fuel tank are absorbed and stored in the onboard
canister. When the engine is running, the fuel vapors absorbed in the canister are
drawn into th ...
Hyundai Kona (OS) 2018-2026 Service Manual: Repair procedures
Replacement
•
When removing the fender, wrap protective tape around a screwdriver
or remover not to damage components
•
Put on ...
