Hyundai Kona: Windshield Wiper/Washer / Front Wiper Motor Repair procedures
| Removal |
| 1. |
Disconnect the negative (-) battery terminal.
|
| 2. |
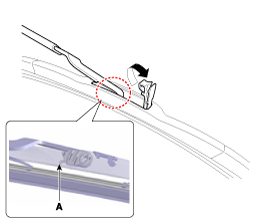
If necessary, release the wiper blade fixing clip by pulling up
and remove the wiper blade from the inside radius of wiper arm.
|
| 3. |
Remove the cowl top cover.
(Refer to Body - "Cowl Top Cover")
|
| 4. |
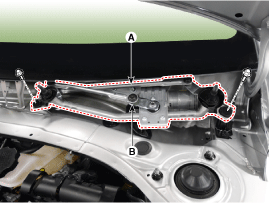
Disconnect the windshield deicer connector (B) after loosening the
wiper moter assembly mounting bolts (A).
|
| 5. |
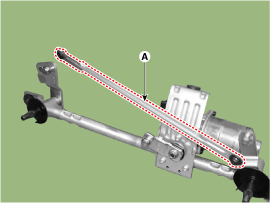
Hold the wiper motor crank arm and remove the upper linkage (A).
|
| 6. |
Hold the wiper motor crank arm and remove the upper linkage (A).
|
| 7. |
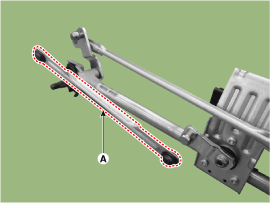
Remove the lower linkage (A) from the wiper motor crank arm.
|
| 8. |
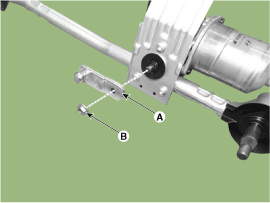
Remove the crank arm (A) after loosening a nut (B).
|
| 9. |
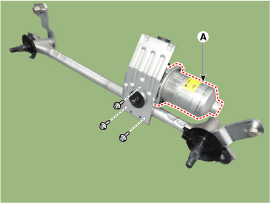
Remove the wiper motor (A) after loosening the bolts.
|
| Installation |
| 1. |
Install the wiper motor.
|
| 2. |
Install the crank arm.
|
| 3. |
Install the lower and upper linkage to the wiper motor crank arm.
|
| 4. |
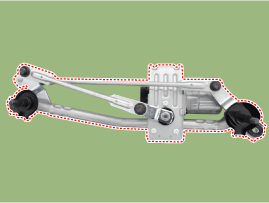
Install the wiper motor and linkage assembly and then connect the
wiper motor connector.
|
| 5. |
Install the cowl top cover.
|
| 6. |
Install the windshield wiper arm and blade.
|
| 7. |
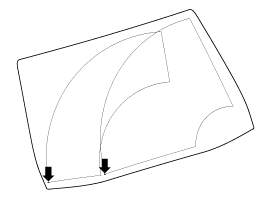
Install the wiper arm and blade to the specified position.
A: Auto stop position (Blade)
|
| Inspection |
| 1. |
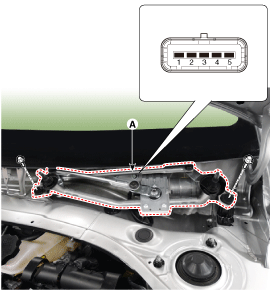
Remove the connector (A) from the wiper motor.
|
| 2. |
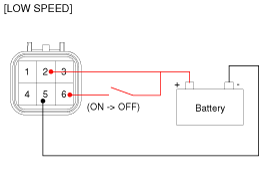
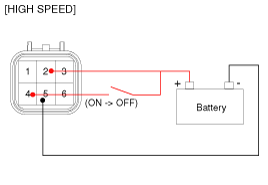
Attach the positive (+) lead from the battery to terminal 3 and
the negative (-) lead to terminal 5.
|
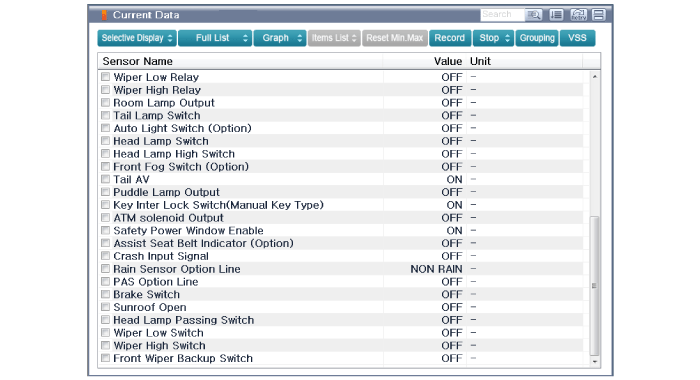
| Inspection (with GDS) |
| 1. |
The wiring harness system on the body can check the failed parts
more rapidly with tester for the vehicle (GDS).
The tester (GDS) provides the following information.
|
| 2. |
Select the "Car Model" and the system to be checked in order to
check the vehicle
with the tester.
|
| 3. |
Select the module to be checked after selecting BCM.
|
| 4. |
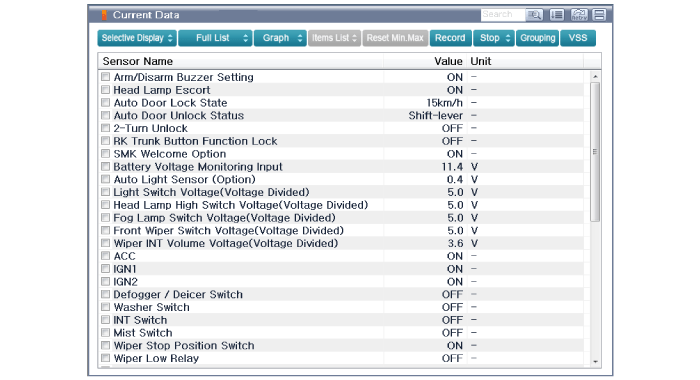
Select the "Input/Output monitoring" menu to search the current
state of the input/output data.
The input/output data for the sensors corresponding to the "Instrument
Panel Module (IPM)" can be checked.
|
 Front Wiper Motor Components and components location
Component Location
1. Cap
2. Nut
3. Wiper arm & blade
4. Cowl top cover
5. Bolt
6. Wiper motor & linkage assembly
7. Wiper ...
 Front Washer Motor Repair procedures
Inspection
Front Washer Motor
1.
With the washer motor connected to the reservoir tank, fill the
reservoir tank with water.
...
Other information:
Hyundai Kona (OS) 2018-2026 Owners Manual: Hood
Opening the hood
1. Park the vehicle and set the parking brake.
2. Pull the release lever to unlatch the hood. The hood should pop open slightly.
3. Go to the front of the vehicle, raise the hood slightly, push the secondary
latch up (1) inside of the hood center and lift the hood (2).
4. Pull ou ...
Hyundai Kona (OS) 2018-2026 Service Manual: Purge Control Solenoid Valve (PCSV) Description and operation
Description
Purge Control Solenoid Valve (PCSV) is installed on the surge tank and controls
the passage between the canister and the intake manifold. It is a solenoid valve
and is open when the ECM grounds the valve control line. When the passage is
open (PCSV ON), fuel vapo ...

