Hyundai Kona: Driveshaft Assembly / TJ Joint Repair procedures
Hyundai Kona (OS) 2018-2026 Service Manual / Driveshaft and axle (2WD-FF) / Driveshaft Assembly / TJ Joint Repair procedures
| Disassembly |
|
| 1. |
Remove the front driveshaft.
(Refer to Driveshaft Assembly - “Front Driveshaft”)
|
| 2. |
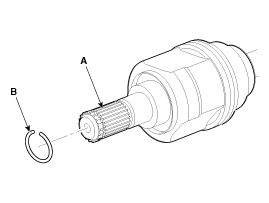
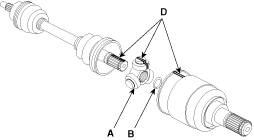
Remove the housing circlip (B) from the driveshaft spline (A).
|
| 3. |
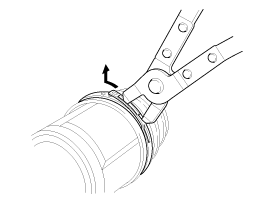
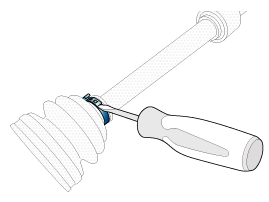
Remove both boot bands from the TJ housing.
|
| 4. |
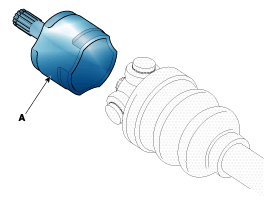
Remove the TJ housing (A).
|
| 5. |
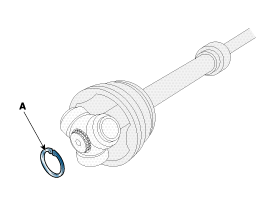
Remove the retainer ring (A) from the shaft.
|
| 6. |
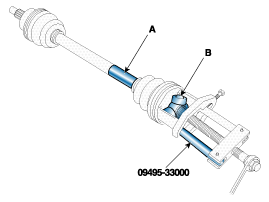
Remove the spider assembly (B) from the driveshaft (A) using the special
tool (09495-33000).
|
| 7. |
Clean the spider assembly.
|
| 8. |
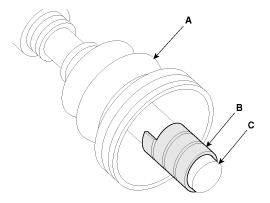
Remove the TJ boot (A).
|
| Inspection |
| 1. |
Check the spider assembly for roller rotation, wear or corrosion.
|
| 2. |
Check the groove inside the joint case for wear or corrosion
|
| 3. |
Check the TJ boots for damage and deterioration.
|
| Reassembly |
| 1. |
Wrap tape around the driveshaft spline(TJ) to prevent damage to the
boot.
|
| 2. |
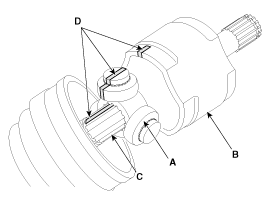
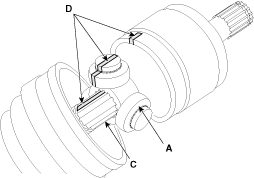
Using the alignment marks (D) made during disassembly as a guide, install
the spider assembly (A) and retainer ring (B) on the driveshaft splines
(C).
|
| 3. |
Add specified grease to the joint boot as much as it was wiped away
at inspection.
|
| 4. |
Install the both boot band.
|
| 5. |
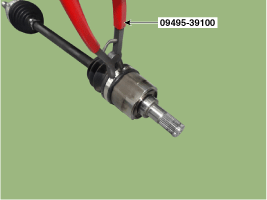
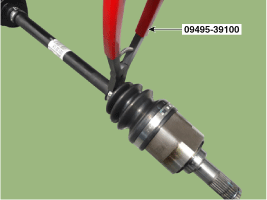
Using the SST (09495-39100) and long nose pliers , secure the TJ boot
bands.
|
| 6. |
Install the front driveshaft.
(Refer to Driveshaft Assembly - "Front Driveshaft")
|
| 7. |
Check the front alignment.
(Refer to Suspension System - "Front Alignment")
|
 TJ Joint Components and components location
Components (1)
[Gamma 1.6 T-GDI, Nu 2.0 MPI]
1. BJ assembly
2. BJ circlip
3. BJ boot band
4. BJ boot
5. Dynamic damper band
6. Dynamic damper
7. ...
 Dynamic Damper Components and components location
Components
1. BJ
assembly
2. BJ circlip
3. BJ boot band
4. BJ boot
5. Dynamic
damper band
6. Dynamic damper
7. Shaft
8. TJ boot band
...
Other information:
Hyundai Kona (OS) 2018-2026 Service Manual: Rear Console Cover Components and components location
Component Location
1. Rear console cover
...
Hyundai Kona (OS) 2018-2026 Service Manual: Components and components location
Component Location
1. Head lamp leveling unit
2. Head lamp leveling actuator
(Built - in Head lamp)
...
© 2018-2026 www.hkona.com


